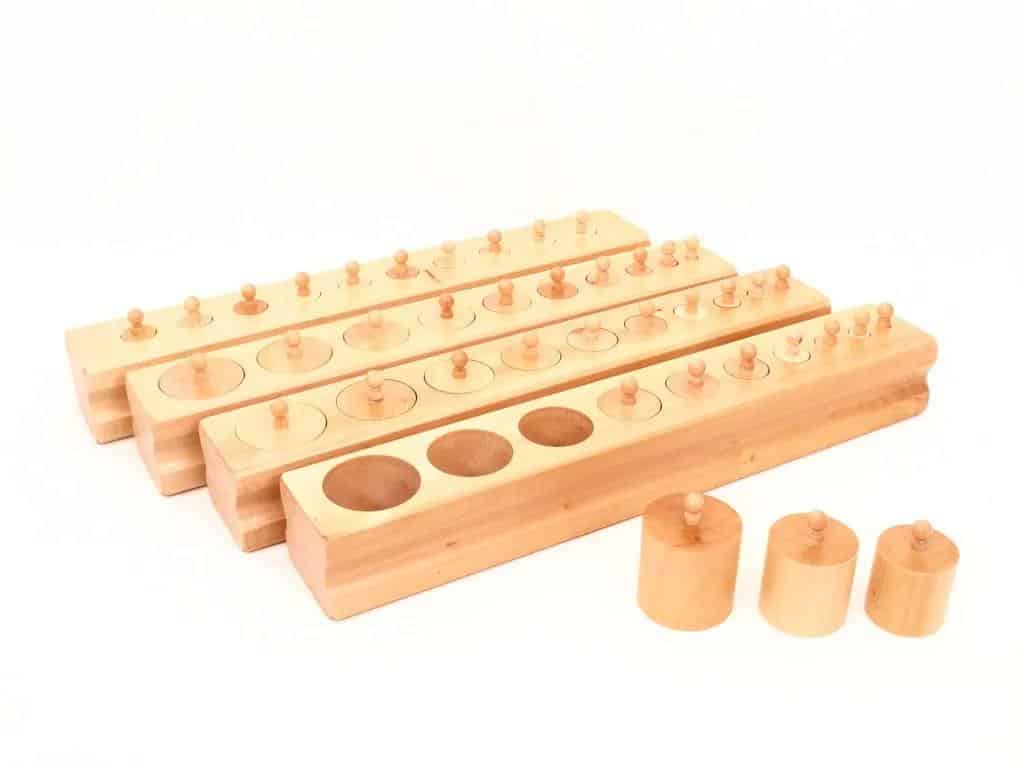
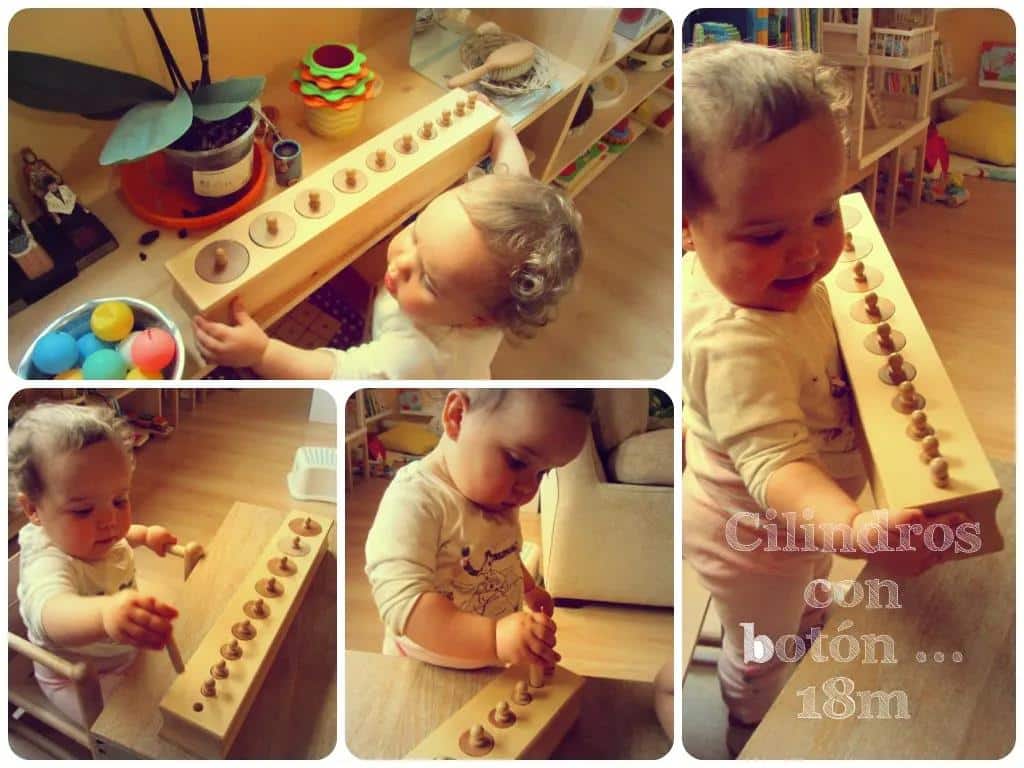
The Montessori socket cylinder is a teaching aid to develop children’s ability to visually observe and distinguish the size and dimensions of objects and to learn how to do exercises initially. Among the sensory teaching aids that appeal to 2-3-year-olds is this socket cylinder.

The socket cylinder has four groups (A/B/C/D), similar to the shape of the pillow, there are (professional version of ten round cavities), (family version of five round cavities) and a small round handle attached to the cylinder.
Applicable age:
2.5 years old and above, the child can be used when entering kindergarten
Direct Objective:
1、To develop children’s ability to visually identify size and dimensions and to allow them to learn how to do the exercises.
2、To exercise children’s ability to control their movements with small muscles, hand-eye dexterity, and coordination.
3、To develop their expressive language skills and use vocabulary.
Indirect purpose:
1、Teach children to spot errors and correct them.
2、Assist children in generating concentration and stimulating a willingness to repeat operations.
3、Develop children’s concentration, sense of order, and powers of observation.

Basic operation:
Operation Ⅰ、cylinder pairing exercises (to A group for example)
- Recommend work to children, introduce the name should be slow and clear, guide children to take the work blanket together and determine the location of the work.
- When taking the socket cylinder, show how to take the teaching aids: open your thumbs with both hands, bring the other four fingers together, hold both ends of the cylinder, and clench both arms. When the strength is not enough, hold it in your arms.
Sit on the child’s preferred hand side, in most cases on the child’s right side. - Place the cylinders from thick to thin and from left to right as a rule.
- Starting from the left, hold the round handle with a three-finger pinch and gently draw it up and place it in front of the socket, then take out the rest of the cylinders in turn and place them in no order.
- Pick up a cylinder, flip it so that its bottom side is facing up, close to the round cavity for comparison, and visually observe whether it is the same, gently embed and try.
- If not, move slowly from left to right until you find the same round cavity.
- Move slowly and concisely, with no verbal interference as much as possible.
- After putting all ten columns in, ask the children to try, and if they are interested, they can introduce the practice in time.
- When the work is finished, organize the teaching aids and return them to the shelf, and put the work blanket back in its place.
- Cylinders B and C groups operate in the same way.

Operation Ⅱ、special D group exercises
- Prepare the work as above.
- Take out the cylinders and place them in no order, pick up a cylinder close to the round point, and compare the height of the cylinder with the depth of the round point by visual observation.
- Using the index and middle fingers of the other hand, rotate against the cylinder, perceive the length through the muscles, and then rotate against the inside of the round point to assist in finding the same round point and gently embed the cylinder.
- Check visually or touch the surface of the round seat with your hand to see if it is flat.
- If not, move slowly from left to right until the same circular point is found.
Operation Ⅲ、three stage name exercise (to A group for example)
- Pre-work as above.
- Take out the cylinders in order and place them in order, take the two contrasting cylinders and practice the names. The names are: thick and thin.
- Practice in three stages of teaching.
First stage (naming)
Introduce the name: This is thick, thick; guide children to pronounce and imitate, observe, and can hold in their hands to touch and perceive. This is fine, fine. (The same method)
Second stage (identification)
Ask children to point out: which one is thick? Which one is the thin one. (Please bring me the thick one, please hide the thin one), quietly switch positions and identify again.
Stage 3 (Pronunciation)
Ask the children to express it in words: What does this look like? What is that like?
When children become proficient, they can gradually narrow the gap between two cylinders and guide them to do it repeatedly until they can identify the difference between the thickness of adjacent cylinders.
Cylinder B group operates in the same way with the same name: tall and thick, short and thin.
Group C is the same, with the same name: thick and short, thin and tall.
Cylindrical D group operates in the same way, with the same name: tall and short (low).
Operation IV、the sequence of cylinders practice (to A group for example)
- Preliminary work as above.
- Take out the cylinders and place them in no order. The teacher asks the children to look carefully and find out the thick cylinders from them and put them aside, then find out the thick ones from the remaining cylinders and arrange them in order from left to right.
- After all the cylinders are sorted, reconfirm them in order from largest to smallest and embed them in the round cavity in turn.
- If they are not right, remove and reorder them and try.
- When children are skilled, they can reverse the sorting.
- Cylinders B, C and D groups operate in the same way.
We introduced a lot of playing methods of socket cylindrical lift. In order to give you a more direct understanding of this teaching, you can refer to this website: Knobbed Cylinders


