Recent early childhood studies show that children between three and five learn science most effectively through hands-on exploration. Research also suggests that young learners who regularly engage in simple experiments develop stronger problem-solving abilities, richer language skills, and a deeper sense of curiosity about the world. These findings highlight how meaningful everyday science experiences can be for preschoolers.
For parents and teachers, this means that introducing science at an early age does not require complicated tools or advanced knowledge. What matters most is offering opportunities for children to observe, test, compare, and ask questions in a natural setting. When activities are simple, playful, and connected to real life, children gain confidence and build a genuine interest in discovery.
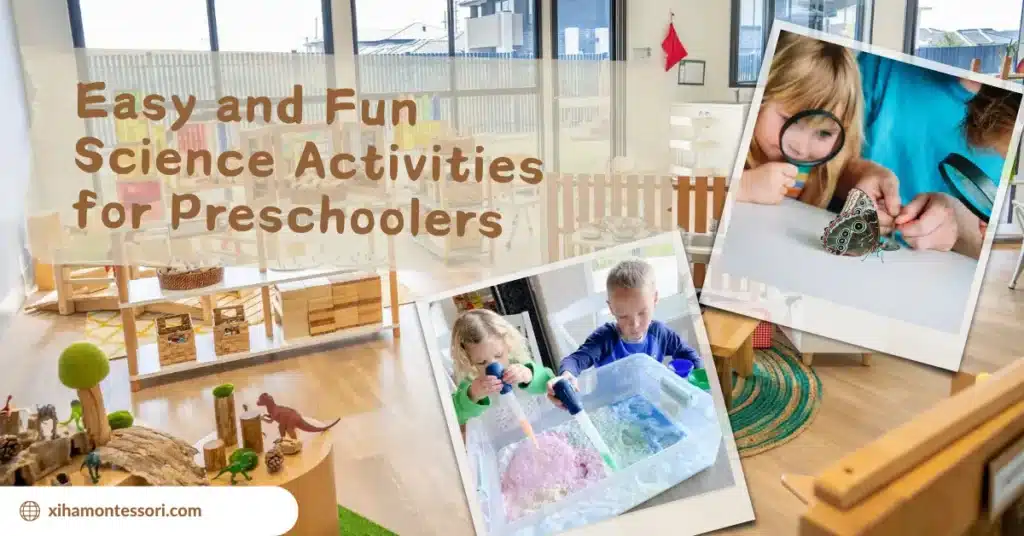
This article brings together a large collection of easy and fun Science Activities for Preschoolers that you can use at home or in the classroom. The activities include sensory science, nature exploration, water experiments, simple chemistry, and many more ideas that are safe and engaging for young children. Each activity is designed to spark curiosity and help preschoolers build early scientific thinking in an enjoyable way.
What Are Important Preschool Science Concepts?
- Observing: Observation is the first step in scientific discovery. Encourage children to use their senses to explore the world around them. Ask questions like, “What do you see?” or “What does it smell like?” to foster curiosity.
- Comparing: Teaching children to compare involves recognizing similarities and differences. Simple activities like comparing the sizes and shapes of leaves or the colors and textures of different rocks.
- Classifying: Have children group objects based on characteristics through observation and comparison. It helps them understand how things are related and improve organizational skills.
- Measuring: Introduces basic measurement concepts using tools like rulers and measuring cups. For instance, children can measure ingredients while cooking or track the growth of plants over time.
- Communicating: Encourage children to share their observations and results with others. Activities like drawing pictures of what they see or discussing their findings in a group.
- Inferring: Inferring involves drawing conclusions based on observations. Teach children to make educated guesses about what they see. For example, if a plant is wilting, they might infer it needs water.
- Predicting: Prediction is about anticipating what will happen next. Engage children in activities where they can make predictions, such as what will happen if you mix specific colors or plant seeds.

Why Play-Based Science Activities Are Important for Preschoolers?
In preschool education, especially within the Montessori and Reggio Emilia frameworks, play is not just play. It’s the foundation of learning. When we introduce science activities through play, we tap into a child’s natural instincts and provide meaningful, hands-on learning experiences. It can also foster their positive awareness of STEM (science, technology, engineering, and mathematics).

- It encourages natural curiosity.
Kids are naturally inquisitive—always asking “why” or “what happens if…?” Play-based science taps into that instinct, giving them the freedom to explore and make sense of the world on their own terms. - It builds critical thinking skills.
When children make predictions and then see whether they were right, they start learning how to think logically, evaluate outcomes, and make decisions based on evidence—all while having fun. - It boosts social development.
Science play often happens in pairs or groups, which means kids are learning to share, take turns, and listen to one another. They’re developing teamwork skills without even realizing it. - It supports cooperative learning.
Working together on a science project teaches kids how to solve problems as a team. They brainstorm, test out ideas, and cheer each other on when something works (or doesn’t). - It builds confidence.
There’s something really empowering about figuring out how something works. When a child successfully completes an experiment, it gives them a sense of accomplishment and fuels their desire to keep learning. - It sparks creativity.
Science and imagination go hand-in-hand. Whether they’re making a volcano erupt or creating their own “invention,” kids learn that it’s okay to try new things and think outside the box.

What Types of Science Activities Are Suitable for Preschoolers?
Science activities for preschoolers are a great way to engage their curiosity and introduce basic scientific concepts in a fun, hands-on way. Here are some types of science activities suitable for preschoolers:
- Exploring Nature: Activities like nature walks, collecting leaves, rocks, or shells, and observing animals can help children learn about the natural world.
- Water Play: Experimenting with floating and sinking objects, water transfer using sponges or pipettes, and playing with water wheels can teach basic principles of physics.
- Kitchen Science: Simple experiments using kitchen ingredients like vinegar and baking soda (for volcano eruptions), mixing colors with food coloring, or making slime can introduce chemical reactions and color theory.
- Weather Watching: Observing and talking about the weather, making a rain gauge, or a simple wind vane can help children learn about weather patterns and the environment.
- Growing Plants: Planting seeds and watching them grow helps teach children about plant biology and the life cycle. This can be coupled with measuring the growth of plants or comparing how plants grow in different conditions (like in light vs. dark).
- Magnet Exploration: Playing with magnets to discover what is magnetic and what is not helps children learn about magnetic forces.
- Bubble Science: Blowing bubbles and observing their colors, shapes, and how they pop can teach properties of liquids and gases.
- Seasonal Change Observations: As the seasons change, you can guide children to observe changes in nature. For example, in the spring, you can observe and record the opening of flowers; in the fall, you can collect fallen leaves of different colors and discuss why the leaves change color. This type of activity helps children understand how seasons affect our environment.
- Holiday-related science activities: Based on different holidays, design related science activities. For example, on Halloween, do a pumpkin volcano experiment, or try making crystallized snowflakes to explore the concepts of dissolving and crystallizing during Christmas.

60 Science Activities for Preschoolers
1. Milk Painting
There’s something almost magical about watching colors swirl and dance across a dish of milk. This simple activity turns a shallow dish into a canvas of scientific wonder. As children gently touch the milk with a soapy swab, they’ll witness vibrant colors dance and mix, revealing how surface tension works in the most mesmerizing way. It’s art, it’s science, and it’s absolutely delightful.

Materials Needed:
- Whole milk
- Food coloring
- Dish soap
- Cotton swabs
- Shallow dish or plate
How to Make It:
- Pour milk into the shallow dish to cover the bottom.
- Add drops of various food coloring around the milk.
- Dip a cotton swab in dish soap.
- Gently touch the soapy end to the milk’s surface.
- Watch as colors swirl and move, demonstrating a chemical reaction.
2. Oil and Water
This activity is like a little chemistry show in a jar. When kids pour oil and water together, they’ll discover that the two just won’t mix. It’s a perfect way to introduce the concept of density in a fun, hands-on way. As the food coloring drops dive through the oil, the “wait for it…” moment builds excitement before the splash of color blooms below. It’s simple, visual, and a total crowd-pleaser in any preschool setting.

Materials Needed:
- Clear jar or glass
- Water
- Cooking oil
- Food coloring
- Spoon
How to Make It:
- Fill a glass halfway with water and add a few drops of food coloring.
- Slowly pour oil into the glass, leaving room at the top.
- Observe how the oil floats above the water due to lower density.
- Stir gently and watch how the two liquids stay separated.
- Encourage the child to describe what they observe.
3. Invisible Ink
Who doesn’t love a secret message? This activity brings out the inner detective in every child. Using lemon juice and a bit of heat, kids can write invisible notes that magically appear. It’s a fantastic way to introduce chemical changes while inspiring imaginative play and even early literacy.

Materials Needed:
- Lemon juice or baking soda
- White paper
- Cotton swab or small brush
- Heat source (lamp, iron, or candle with adult supervision)
How to Make It:
- Dip a cotton swab or brush into lemon juice or baking soda solution.
- Write a message or draw on the white paper.
- Allow the paper to dry completely.
- Gently heat the paper using a lamp or iron (with adult help).
- Watch as the invisible message turns brown and becomes visible.
4. Homemade Slime
Nothing delights preschoolers quite like slime. It’s gooey, stretchy, and oddly satisfying to squish between little fingers. But beyond the mess and giggles, this activity introduces children to the concept of mixing materials to create something totally new. It’s a sensory adventure that also lays the groundwork for early chemistry skills.

Materials Needed:
- White school glue
- Baking soda
- Contact lens solution (containing boric acid)
- Food coloring (optional)
- Bowl and spoon
How to Make It:
- Pour about ½ cup of glue into a mixing bowl.
- Add food coloring if desired and mix well.
- Add 1 tablespoon of baking soda and stir.
- Gradually add contact lens solution while stirring until slime forms.
- Knead the slime with your hands until it’s stretchy and consistent.
5. Sink or Float
This is one of those classic preschool experiments that never gets old. It’s hands-on, full of surprises, and sneakily teaches scientific reasoning. Kids gather various objects, make guesses (hypotheses), and then test to see whether the objects sink or float. It’s a joyful way to introduce weight, density, and buoyancy—all in one splashy session.

Materials Needed:
- Large container of water
- Assorted household items (e.g., spoon, crayon, sponge, coin, plastic toy)
- Towel for drying
How to Make It:
- Fill the container with water.
- Present each item and ask the child to predict if it will sink or float.
- Test each item one at a time.
- Sort and discuss the results.
- Ask questions like “Why do you think this floated?” or “What made it sink?”
6. Make a Rain Cloud in a Jar
This simple water-and-shaving-cream activity transforms a clear jar into a tiny sky kids can hold in their hands. Watching colored “rain” fall through a fluffy cloud helps children visualize how real clouds become heavy and release water. It’s soothing, beautifully visual, and a wonderful early introduction to weather science.

Materials Needed:
- Clear jar or glass
- Shaving cream
- Water
- Food coloring
- Spoon or dropper
How to Make It:
- Fill the jar about ¾ full with water.
- Spray shaving cream on top to form the “cloud.”
- Mix a few drops of food coloring with water in a separate cup.
- Using a spoon or dropper, slowly add colored water on top of the shaving cream.
- Watch as the color “rains” down through the cloud.
7. Lava Lamp Experiment
Get ready for bubbles, color, and a whole lot of “oohs” and “aahs.” This homemade lava lamp introduces children to chemical reactions and density in the coolest way. The moment the fizzy tablet drops in, colorful blobs begin to rise and fall, mimicking the groovy glow of a real lava lamp. It’s a mesmerizing blend of science and art, and totally preschool-approved.

Materials Needed:
- Clear plastic bottle
- Water
- Vegetable oil
- Food coloring
- Alka-Seltzer tablets
How to Make It:
- Fill the bottle about one-third full with water.
- Add food coloring and mix well.
- Fill the rest of the bottle with oil.
- Break an Alka-Seltzer tablet into pieces and drop them in.
- Watch the bubbles move up and down like a lava lamp.
8. Walking Water Science Experiment
This activity is part magic, part science, and all about discovery. As kids watch colored water “walk” from one cup to another using paper towels, they’ll learn about capillary action in a way that makes sense to them. It’s colorful, exciting, and filled with anticipation—perfect for young learners who love to watch change unfold before their eyes.

Materials Needed:
- 6 clear cups
- Water
- Food coloring (red, yellow, blue)
- Paper towels
How to Make It:
- Line up the cups in a circle or straight line.
- Fill every other cup with water and add food coloring.
- Roll or fold paper towels and place one end in a full cup and the other in an empty cup.
- Watch as colored water “walks” through the paper towels.
- Over time, new colors appear in the previously empty cups.
9. Water Xylophone Fun
There’s something magical about creating music using nothing but water and glass jars. Children quickly notice the change in pitch as they tap cups filled with different water levels. This activity blends science, math, and music into a joyful sensory experience that feels like a mini concert right at the table.

Materials Needed:
- 5–6 identical glass jars
- Water
- Metal spoon
- Food coloring (optional)
How to Make It:
- Fill each jar with different levels of water.
- Add food coloring to each jar if desired.
- Line up the jars from most to least water.
- Tap each jar gently with the spoon and listen to the pitch.
- Let the child explore making simple tunes.
10. Inflate a Balloon with Baking Soda and Vinegar
Few things thrill preschoolers like watching a balloon inflate without anyone blowing into it. This activity takes a classic baking soda–vinegar reaction and turns it into a delightful piece of “science magic.” Kids see gas in action, observe bubbling reactions, and begin to understand cause and effect in a hands-on way that sticks.

Materials Needed:
- Balloon
- Empty plastic bottle
- Baking soda
- Vinegar
- Funnel or spoon
How to Make It:
- Pour vinegar into the bottle (about ¼ full).
- Use a funnel to fill the balloon with 2 tablespoons of baking soda.
- Stretch the balloon opening over the bottle’s mouth, keeping the baking soda inside.
- Lift the balloon to let the baking soda fall into the vinegar.
- Watch as the balloon inflates from the gas created.
11. Floating Dry Erase Marker
This activity feels like real magic. Children draw on the bottom of a plate with a dry erase marker, then watch their artwork come to life and float! It’s a fun way to introduce the concept of surface tension and how certain materials interact with water. Best of all, it uses just a few household items, but the reaction leaves kids in awe every time.

Materials Needed:
- Dry erase marker
- Ceramic or glass plate
- Water
- Cup or pitcher
How to Make It:
- Use the dry erase marker to draw simple shapes or figures on the plate.
- Slowly pour water onto the edge of the plate.
- Watch as the drawings lift and float on the water’s surface.
- Move the plate gently to see the floating drawing drift and dance.
12. Fireworks in a Jar
This colorful experiment mimics the beauty of fireworks, but in a safe, up-close way. As oil and food coloring mix and fall through water, they create stunning color explosions that fascinate little ones. It’s a gorgeous visual for exploring density, emulsions, and color mixing — all while making science feel exciting and memorable.

Materials Needed:
- Clear jar or glass
- Warm water
- Food coloring
- Vegetable oil
- Fork
How to Make It:
- Fill a clear jar or glass ¾ full with warm water.
- In a separate cup, mix a few tablespoons of oil and several drops of food coloring.
- Gently stir the oil and coloring with a fork.
- Pour the oil mixture into the water and observe.
- Watch as the colors burst and fall like fireworks.
13. Catapult STEM Activity
Building a simple catapult turns snack time into science time. Preschoolers get to design, test, and re-test a tool that launches soft items across the room. This activity blends physics, engineering, and critical thinking in a way that’s active and energetic — perfect for kinesthetic learners and wiggle-friendly classrooms.

Materials Needed:
- Popsicle sticks
- Rubber bands
- Plastic spoon
- Small objects to launch (pom-poms, marshmallows, etc.)
How to Make It:
- Stack 5–6 sticks and secure both ends with rubber bands.
- Slide two more sticks between the stack to form a T-shape.
- Attach a spoon to the top stick with a rubber band.
- Load an object in the spoon, press it down, and release.
- Observe how far the object flies and adjust the design as needed.
14. Make Oversized Bubbles
Nothing says childhood wonder like giant bubbles floating across the yard. With a few simple ingredients, you can create your own oversized bubble mix. Kids learn about air, surface tension, and trial and error, all while running, playing, and marveling at what they made themselves.

Materials Needed:
- Water
- Dish soap
- Glycerin or corn syrup
- Large bowl
- String
- Straws
How to Make It:
- Mix 6 cups water, 1 cup dish soap, and ¼ cup glycerin or corn syrup.
- Thread string through two straws and tie to form a loop.
- Dip the loop into the solution and slowly pull it out.
- Spread the straws to form a film, then move gently to make large bubbles.
15. Baking Soda and Vinegar Reactions
This classic reaction never loses its magic. When baking soda meets vinegar, the fizzing, bubbling eruption captivates preschoolers instantly. It’s an ideal opportunity to introduce children to chemical reactions and gas formation. Whether you turn the reaction into a volcano, a fizzy color explosion, or a sensory tray, the excitement and learning go hand-in-hand.

Materials Needed:
- Baking soda
- Vinegar
- Clear container
- Food coloring (optional)
- Dropper or spoon
How to Make It:
- Place baking soda in the container.
- Add food coloring if desired.
- Use a dropper or spoon to pour vinegar onto the baking soda.
- Watch the fizzing and bubbling reaction.
- Experiment with different amounts and colors.
16. Watch Rice Dance in Water
This bubbly activity brings science to life—literally! As tiny grains of rice bounce and bob around in fizzy water, preschoolers get a front-row seat to a gas-powered dance party. It’s a simple but mesmerizing way to demonstrate chemical reactions and the power of carbon dioxide. The result? Laughs, excitement, and a whole lot of “Why is it doing that?” moments.

Materials Needed:
- Uncooked rice
- Clear glass
- Baking soda
- Vinegar
- Water
How to Make It:
- Fill the glass halfway with water.
- Add baking soda and stir until dissolved.
- Add a spoonful of rice.
- Pour in vinegar and watch the rice rise and fall.
17. Learn What Dissolves in Water
Preschoolers love to mix and stir, and this experiment lets them do just that. By testing which everyday materials dissolve in water, children begin to understand solubility, texture, and the idea that not everything behaves the same when mixed. It’s an interactive way to build early observation and comparison skills.

Materials Needed:
- Spoons
- Clear cups
- Water
- Various substances (sugar, salt, oil, flour, sand)
How to Make It:
- Fill each cup with water.
- Add one different substance to each cup.
- Stir and observe which substances dissolve and which don’t.
- Discuss the differences and try warm water for comparison.
18. Blow Bubble Towers
This bubbly, foamy experiment combines science and sensory play into one joyful, giggle-inducing experience. As kids blow into a container of soapy water, they’ll create towering, shimmering bubbles that grow and grow. It’s great for teaching air pressure, breath control, and observation. Of course, it can get messy when you play with it, but it’s 100% worth it.

Materials Needed:
- Straw
- Water
- Dish soap
- Food coloring (optional)
- Tall cup
How to Make It:
- Pour water and dish soap into the cup and stir.
- Add food coloring if desired.
- Insert a straw and blow to create bubbles.
- Keep blowing to build a foam tower.
19. Grow a Paper Towel Rainbow
Color, patience, and a little bit of capillary action come together in this beautifully simple experiment. As water travels from one cup to another through a paper towel, colors “walk” and mix to create a soft, stunning rainbow. It’s a gentle, peaceful activity that encourages observation and introduces the concept of water movement in a visual way.

Materials Needed:
- 6 clear cups
- Paper towels
- Water
- Food coloring
How to Make It:
- Fill 3 cups with water and add red, yellow, and blue food coloring.
- Place empty cups between the colored ones.
- Fold paper towels into strips and connect all cups.
- Watch as the colored water travels and mixes into new colors.
20. Seed Germination
For children, witnessing a seed sprout and grow is like magic. This activity allows children to see the entire growth process of a plant firsthand. It cultivates children’s patience, observation skills, and affinity for nature, and introduces them to the plant life cycle in the most intuitive way.

Materials Needed:
- Water
- Seeds (beans work well)
- Paper towel
- Clear cup or plastic bag
How to Make It:
- Wet a paper towel and place it inside the cup or bag.
- Insert seeds between the towel and plastic so they are visible.
- Keep moist and place in sunlight.
- Watch the seed grow roots and shoots over several days.
21. Build an Apple Toothpick Tower
Give your preschooler a handful of toothpicks and some apple chunks, and suddenly—they’re engineers in the making. This fun, food-based activity helps little hands practice fine motor skills while learning about balance, structure, and spatial thinking. Kids will love the challenge of making their apple towers stand tall without toppling.

Materials Needed:
- Tray or flat surface
- Apple pieces (cut into cubes or chunks)
- Toothpicks
How to Make It:
- Cut apples into chunks big enough to stick a toothpick into.
- Provide children with toothpicks and apple pieces.
- Encourage them to build towers, bridges, or structures by connecting apple chunks with toothpicks.
- Let them test how tall or wide they can build.
22. Stack Up Plastic Cups
This classic stacking game turns into a full-blown STEM challenge when preschoolers experiment with how high they can go. Using plastic cups, kids can create pyramids, towers, and even mini cup cities. It also teaches concepts like gravity, weight, and structure. The game is simple to set up, highly engaging, and offers numerous opportunities to solve problems.

Materials Needed:
- Optional: timer or challenge cards
- Plastic cups (same size)
- Flat surface
How to Make It:
- Provide children with a stack of cups.
- Challenge them to build pyramids or other shapes.
- Introduce a timer for added fun and competition.
- Encourage them to knock them down and rebuild.
23. Make Pretend Snow
No snow outside? No problem. This sensory-rich science activity brings winter indoors with a fluffy, cool-to-the-touch pretend snow that’s easy to make and fun to play with. Preschoolers explore texture, temperature, and even a little chemistry as they mix up a snowy surprise that doesn’t melt.

Materials Needed:
- Bowl and spoon
- Baking soda
- White conditioner or shaving cream
How to Make It:
- Mix 2 cups of baking soda with 1/2 cup of white conditioner or shaving cream in a bowl.
- Stir until it reaches a moldable, snow-like texture.
- Let children play freely with the cold, soft snow.
24. Melting Ice
Melting ice might sound simple, but for preschoolers, it’s full of mystery. Why does it melt? What speeds it up? What happens when salt touches it? This activity lets kids explore temperature, states of matter, and change over time — all with their hands and eyes wide open.

Materials Needed:
- Tray or bowl
- Ice cubes or frozen shapes
- Salt
- Water
- Food coloring (optional)
How to Make It:
- Place ice cubes in a tray.
- Sprinkle salt on top to accelerate melting.
- Add drops of food coloring to highlight cracks and changes.
- Observe as ice melts and colors move.
25. Skittles Rainbow
This is one of those magical “ooh and ahh” activities that delivers instant delight. When water meets Skittles arranged in a circle, the colors race to the middle, creating a rainbow swirl that’s almost too pretty to believe. It’s a perfect introduction to color diffusion and water absorption.

Materials Needed:
- White plate
- Skittles
- Warm water
How to Make It:
- Arrange Skittles in a circle around the edge of the plate.
- Slowly pour warm water into the center.
- Watch as the colors dissolve and move toward the middle, forming a rainbow.
26. Magnetic Discovery Bottles
This sensory-rich activity introduces children to the invisible force of magnetism in the most accessible way. Magnetic discovery bottles are like mini treasure hunts. Kids shake, turn, and wave a magnet around the bottle, watching objects dance and move inside. It’s quiet, calming, and sparks curiosity about how and why things move without being touched.

Materials Needed:
- Magnet wand
- Empty plastic bottle
- Water or rice
- Magnetic and non-magnetic small items (paperclips, screws, foil balls, buttons)
How to Make It:
- Fill the bottle with water or dry rice.
- Add small items inside and close tightly.
- Shake and mix the contents.
- Use the magnet to detect which items respond.
27. Balloon Rocket Science
Ready for takeoff? This activity transforms a balloon into a speedy rocket. Racing down a string path with a hiss of air and a lot of excitement. Balloon rockets are a dynamic way to demonstrate motion, force, and propulsion in a preschool-friendly, giggle-inducing way.

Materials Needed:
- Two fixed points (e.g., chair backs)
- Balloon
- String
- Straw
- Tape
How to Make It:
- Thread the string through the straw and tie each end to opposite supports.
- Inflate a balloon but don’t tie it.
- Tape the balloon to the straw.
- Let go of the balloon and watch it rocket along the string.
28. String Telephone
This old-school favorite brings smiles and wide eyes every time. By turning two cups and a piece of string into a working “telephone,” preschoolers discover how sound vibrations travel. It’s part science, part storytelling, and part teamwork — a wonderful combo for any preschool day.

Materials Needed:
- Toothpick or sharp pencil to poke holes
- Two paper cups
- Long string
How to Make It:
- Poke a small hole in the bottom of each cup.
- Thread the string through and tie knots inside to secure it.
- Stretch the string tight between two people.
- One speaks into a cup while the other listens.
29. Static Comb
Static electricity might seem invisible, but preschoolers can feel and see it in this playful activity. Using just a comb and a bit of hair-raising action, kids can make bits of paper dance, balloons stick, and hair stand on end. It’s a simple way to introduce unseen energy in an interactive way.

Materials Needed:
- Wool fabric or hair
- Plastic comb
- Small paper bits or puffed cereal
How to Make It:
- Tear paper into small pieces or use puffed cereal.
- Rub the comb on wool or hair for 30 seconds.
- Hold the comb near the bits and watch them lift.
30. Glowing Water Experiment
Turn off the lights and turn up the wonder! This experiment uses everyday materials to make water glow under a blacklight, creating a magical environment for learning about fluorescence. It’s calming, mysterious, and full of opportunities for questions — a favorite for sensory corners or science-themed evenings.

Materials Needed:
- Clear cup or container
- Tonic water (with quinine)
- Black light
How to Make It:
- Pour tonic water into a clear glass or container.
- Turn off the lights and shine a black light over the glass.
- Watch the water glow blue.
31. Shadow Play
Shadow play is one of those simple joys that captivates kids with nothing more than a flashlight and imagination. By exploring how light interacts with objects, children begin to grasp early physics concepts like light sources, transparency, and shape. Plus, it’s a wonderful creative outlet for storytelling, puppet shows, and playful movement.

Materials Needed:
- Optional: paper cutouts, cardboard shapes
- Flashlight or natural sunlight
- Small toys or hands
- White wall or screen
How to Make It:
- Set up a light source in a dim or dark space.
- Place objects or hands in front of the light to create shadows.
- Move objects closer or farther to observe changes.
- Try creating stories or guessing shapes through silhouette play.
32. Bug Observation
Bugs are everywhere. For preschoolers, they’re fascinating. Taking the time to observe a ladybug, ant, or butterfly up close helps children develop patience, respect for nature, and early classification skills. It’s a quiet, gentle way to connect with the living world, even in your own backyard.

Materials Needed:
- Outdoor space or garden
- Bug jar or magnifying container
- Magnifying glass
- Notebook and pencil
How to Make It:
- Guide children to gently collect bugs like ants, beetles, or caterpillars.
- Place them in a safe observation jar.
- Encourage kids to look closely and describe what they see.
- Release bugs back into nature after observation.
33. Plant Dissection
Pulling apart a flower or leaf might seem messy, but it’s actually a powerful science lesson. Dissecting a plant shows preschoolers that even familiar things are made of many parts — roots, stems, petals, veins. It connects them with nature, deepens observation skills, and introduces the beauty of life sciences.

Materials Needed:
- Magnifying glass
- Fresh flowers (e.g., lilies, daisies)
- Tweezers or child-safe scissors
- Tray or white paper
How to Make It:
- Give each child a flower to examine.
- Help them take it apart petal by petal.
- Use magnifying glasses to look closely at stems, petals, stamens, and pistils.
- Discuss each part’s role in the plant’s life cycle.
34. Cloud Dough
Soft, moldable, and delightfully squishy, cloud dough is a sensory favorite that teaches kids about texture, measurement, and transformation. Made from just two simple ingredients, it feels dry like flour but shapes like play dough. Perfect for calming sensory play, imaginative construction, or quiet time exploration.

Materials Needed:
- Spoon
- 2 cups flour
- ¼ cup baby oil or vegetable oil
- Bowl
How to Make It:
- Pour the flour into a bowl.
- Slowly add the oil while mixing.
- Keep mixing until the dough holds its shape when squeezed.
- Play and mold into shapes or use cookie cutters.
35. Sand Play
From digging to building to pouring, sand play invites children to explore early engineering and sensory concepts in a totally natural way. Whether they’re outside in a sandbox or using kinetic sand indoors, preschoolers are experimenting with structure, volume, and texture every time their hands dive in.

Materials Needed:
- Optional: water, natural objects
- Clean sand
- Trays or sensory bins
- Tools (scoops, funnels, cups)
How to Make It:
- Pour sand into a sensory bin or tray.
- Offer tools or leave it open-ended.
- Add water for wet sand play and new textures.
- Encourage free exploration and building.
36. Scent Jars
Engaging a child’s sense of smell opens up a whole new world of learning. Scent jars encourage preschoolers to compare, categorize, and describe different smells—while building vocabulary and fine-tuning sensory awareness. This quiet activity sparks big discussions: What does cinnamon remind you of? Do lemons smell “sharp” or “sweet”? It’s science, memory, and mindfulness rolled into one.

Materials Needed:
- Small containers or jars with lids
- Cotton balls
- Assorted scent extracts (vanilla, lemon, peppermint, cinnamon, etc.)
- Labels or colored dots
How to Make It:
- Soak cotton balls in various scents.
- Place one scented cotton ball in each jar.
- Seal and label each jar (or keep it a mystery).
- Have children smell each jar and guess the scent.
37. Leak-Proof Bag
Stick pencils through a plastic bag of water… and not a drop spills out? Sounds like magic, but it’s a simple and powerful science lesson about polymers and molecular bonds. Preschoolers are amazed as they push sharp pencils into a water-filled bag and the water stays put. It’s an unforgettable way to build confidence, wonder, and a love for experimentation.

Materials Needed:
- Water
- Ziplock bag
- Sharp pencils
How to Make It:
- Fill a Ziplock bag about ¾ with water.
- Seal it tightly.
- Slowly push sharpened pencils through the bag (both sides).
- Observe that the bag doesn’t leak.
38. Floating Egg
This activity brings density to life in a kid-friendly way. A regular egg sinks — but with a little salt, it floats! Watching the egg rise in salty water shows children that not all liquids are the same, and it’s a gentle way to introduce scientific concepts like buoyancy and density using materials right from your kitchen.

Materials Needed:
- Salt
- Raw eggs
- Glasses or jars
- Water
How to Make It:
- Fill one glass with plain water and another with salty water (3+ tablespoons of salt).
- Carefully place an egg in each.
- Observe how the egg sinks in regular water but floats in saltwater.
39. Color Changing Flowers Experiment
Watching a white flower change color feels like something out of a fairy tale. It teaches preschoolers how plants drink! This experiment demonstrates capillary action and water absorption in a beautiful, slow-paced way. It’s also perfect for tying into lessons on plants, seasons, or even storytelling.

Materials Needed:
- Food coloring
- White flowers (e.g., carnations)
- Clear cups
- Water
How to Make It:
- Fill cups with water and add different food coloring to each.
- Trim flower stems and place one in each cup.
- Watch over a day or two as petals change color.
40. Elephant Toothpaste
Ready for a big, foamy eruption? Elephant toothpaste is an explosive science activity that wows every time. Though named for its oversized sudsy effect, this safe chemical reaction teaches kids about oxygen release, heat, and catalysts—made accessible through a bubbly show they’ll beg to repeat.

Materials Needed:
- Warm water
- Empty plastic bottle
- ½ cup hydrogen peroxide (3%)
- Dish soap
- Food coloring (optional)
- 1 tablespoon dry yeast
How to Make It:
- Mix hydrogen peroxide, dish soap, and food coloring in the bottle.
- In a separate cup, mix yeast with warm water.
- Pour the yeast mixture into the bottle and step back.
- Watch the foamy explosion erupt!
41. Butterfly Life Cycle
Few changes in nature are as wondrous as the life cycle of a butterfly. Watching a tiny caterpillar turn into a butterfly captures children’s imaginations while teaching them about biology, change, and growth. Whether you’re using real caterpillars or storytelling props, this activity connects kids to the wonder of living things and the stages they go through.

Materials Needed:
- Observation journal
- Butterfly kit with live caterpillars (or images for observation)
- Jar or mesh habitat
- Leaves or food (as instructed in kit)
How to Make It:
- Place caterpillars in a safe, ventilated container.
- Observe their growth and transformation into chrysalises.
- Monitor daily until butterflies emerge.
- Release butterflies outdoors when ready.
- Record each stage in an observation journal or drawing.
42. Color-Changing Milk
Get ready for some swirls, twirls, and unexpected beauty. Color-changing milk is a mesmerizing science activity that introduces surface tension and chemical reactions with a splash of art. When soap touches the surface of food-colored milk, the colors explode and move, sparking conversations about invisible forces at play.

Materials Needed:
- Shallow dish
- Whole milk
- Food coloring
- Dish soap
- Cotton swabs
How to Make It:
- Pour milk into a shallow dish.
- Add drops of food coloring.
- Dip a cotton swab in dish soap.
- Touch the soapy swab to the milk surface.
- Watch the colors swirl and move around.
43. Water Absorption
Preschoolers love to pour and soak, and this activity turns those everyday actions into a lesson on absorption. Using different materials, children explore which ones soak up water and which ones resist it. It’s simple, sensory-rich, and builds essential comparison and problem-solving skills.

Materials Needed:
- Food coloring (optional)
- Paper towels
- Sponges
- Cloth
- Plastic tray
- Water
How to Make It:
- Pour water into a tray.
- Provide absorbent materials like towels, cloths, and sponges.
- Let children test which materials absorb the most water.
- Optionally, color the water to enhance visibility.
44. Observe What Melts in the Sun
The sun becomes the scientist in this activity! Set out various objects on a sunny day and let your preschooler observe what melts and what doesn’t. It’s a hands-on way to talk about heat, temperature, and change — and it’s a great way to spend a warm afternoon doing science outdoors.

Materials Needed:
- Timer or notebook
- Tray or foil sheet
- Assorted items (ice, crayons, chocolate, rocks, plastic toys)
- Sunny outdoor space
How to Make It:
- Place selected items on a tray in direct sunlight.
- Observe what happens over time.
- Record which items melt, change, or stay the same.
- Discuss why some items melted and others didn’t.
45. Grow Grass in Eggshells
This charming little gardening project lets kids become caretakers of tiny living things. Watching grass grow in cracked eggshells teaches preschoolers about planting, patience, and life cycles. Decorating eggs with various expressions transforms the activity into an educational and fun character-building craft activity. It perfectly blends science, nature, and art.

Materials Needed:
- Marker or stickers (optional for decorating)
- Cleaned eggshell halves
- Potting soil
- Grass seeds
- Water
How to Make It:
- Fill each eggshell with soil.
- Sprinkle grass seeds on top.
- Water lightly and place in a sunny spot.
- Water daily and observe growth.
- Decorate the shells for added fun.
46. Ocean in a Bottle
Bring the calm and wonder of the sea right into your classroom or kitchen. Ocean-in-a-bottle activities help children understand how water and oil don’t mix and the gentle waves they create mimic the movement of real ocean currents. Add a few shells or tiny sea animals, and it becomes a beautiful science-meets-storytelling sensory bottle.

Materials Needed:
- Small plastic sea animals (optional)
- Clear plastic bottle with lid
- Water
- Blue food coloring
- Vegetable oil
How to Make It:
- Fill the bottle halfway with water and add blue food coloring.
- Fill the rest of the bottle with vegetable oil.
- Optional: Add small plastic sea creatures.
- Seal the lid tightly and shake gently.
- Observe the water and oil separate like ocean waves.
47. Disappearing Eggshells
Watch science “eat away” an eggshell right before your child’s eyes! This vinegar-based experiment softens and dissolves the calcium in the shell, leaving behind a bouncy, rubbery egg. It’s a hands-on way to explore chemical reactions, materials, and change.

Materials Needed:
- Vinegar
- Raw egg
- Clear cup or jar
How to Make It:
- Carefully place a raw egg into a jar.
- Pour vinegar over it until fully submerged.
- Let it sit for 24–48 hours.
- Gently remove and feel the soft, rubbery egg.
48. Make an Aluminum Foil Boat
With nothing but foil and water, your preschooler can become a mini boat engineer! This fun experiment is all about designing, testing, and improving. As kids fold and shape their boats, they’re learning about buoyancy, balance, and surface area.

Materials Needed:
- Pennies or small weights
- Aluminum foil
- Tub of water
How to Make It:
- Shape aluminum foil into different boat designs.
- Place them in the water.
- Add weights one at a time and see how much each boat can hold.
- Try different shapes for improved performance.
49. Measure the Water Content of Snow
On a snowy day, this simple science experiment allows children to discover mysteries while playing. Children can shovel snow, bring it indoors, and observe it melt. This helps them understand that snow contains far less water than it appears on the surface. It’s a wonderful way for children to explore weather, temperature, and changes while connecting what they learn to their surroundings.

Materials Needed:
- Indoor space to let snow melt
- Clean snow
- Clear measuring cup
How to Make It:
- Collect fresh snow in a measuring cup.
- Mark the volume of snow.
- Bring it inside and let it melt completely.
- Compare the new water level to the original snow volume.
50. Grow Delicious Rock Candy Crystals
Growing your own candy sounds like a dream. But it’s actually a crystal-growing experiment in disguise. This sweet science teaches children about evaporation, saturation, and crystal formation, all while giving them a tasty reward at the end. It takes a little patience, but the sparkling results are worth it.

Materials Needed:
- Food coloring (optional)
- Water
- Sugar
- Wooden skewers
- Clothespins
- Tall jar or glass
How to Make It:
- Boil 2 cups of water and add sugar until no more dissolves.
- Pour into a jar and add food coloring if desired.
- Dip a skewer in the liquid, roll it in sugar, then place it back.
- Use clothespins to suspend the skewer in the center.
- Watch crystals grow over 5–7 days.
51. Make a Scale
Balance, weight, and comparison all come together in this simple engineering activity. By building their own scale, preschoolers get a hands-on feel for what’s heavy, what’s light, and how objects compare. It’s a fantastic way to introduce early math and measurement through playful prediction and trial-and-error testing.

Materials Needed:
- Items to weigh (blocks, toys, rocks, etc.)
- Hanger
- String
- 2 small cups or containers
How to Make It:
- Tie one cup to each side of the hanger using equal lengths of string.
- Hang the hanger from a rod, doorknob, or hook.
- Place objects into the cups and observe which side dips lower.
- Try to balance the cups by adjusting the contents.
52. Make Ice Grow
This chilly science trick feels like a bit of frozen magic. By supercooling water and triggering it at the right moment, preschoolers can watch ice “grow” before their eyes. It’s a fascinating introduction to states of matter and timing — and a perfect activity to wow curious minds.

Materials Needed:
- Shoeboxes or trays
- Toy animals
- Natural materials (sand, leaves, twigs, rocks, water)
How to Make It:
- Choose different animals and assign them a habitat (e.g., desert, jungle, ocean).
- Use natural materials to recreate the habitats in separate trays or boxes.
- Let children place animals in their appropriate environments.
- Discuss why each animal lives in its particular habitat.
53. Learn About Animal Habitats
What makes a frog feel at home? Or a polar bear? Learning about habitats connects children to animals’ needs and environments, fostering empathy and an early appreciation for ecology. Through storytelling, sensory games, or toy play, preschool children can explore jungles, oceans, deserts, and forests in their own little world.With storytelling, sensory bins, or toy play, preschoolers can explore jungles, oceans, deserts, and forests—all from their own space.

Materials Needed:
- Toy animals
- Natural materials (sand, leaves, twigs, rocks, water)
- Shoeboxes or trays
How to Make It:
- Choose different animals and assign them a habitat (e.g., desert, jungle, ocean).
- Use natural materials to recreate the habitats in separate trays or boxes.
- Let children place animals in their appropriate environments.
- Discuss why each animal lives in its particular habitat.
54. LEGO Volcano
Combine engineering, chemistry, and dramatic fun by building a volcano out of LEGO bricks—and making it erupt! This activity is a preschooler favorite, as it brings the excitement of bubbling lava to their favorite building toy. It’s a colorful, hands-on way to introduce chemical reactions and earth science.

Materials Needed:
- Red food coloring
- LEGO bricks
- Small cup or container (to fit inside the volcano)
- Baking soda
- Vinegar
How to Make It:
- Build a volcano shape out of LEGO bricks around a small cup.
- Add baking soda and a few drops of food coloring to the cup.
- Pour in vinegar and watch the eruption.
- Rebuild or redesign the volcano for different effects.
55. Homemade Compass
Turning a needle and a cup of water into a working compass helps kids explore magnetism and navigation in a way that feels like a real adventure. It’s simple, surprising, and perfect for introducing directional awareness and Earth’s magnetic field in early childhood learning.

Materials Needed:
- Small piece of cork or foam
- Bowl of water
- Sewing needle
- Magnet
How to Make It:
- Rub a magnet along a needle several times in one direction.
- Carefully push the needle through a small piece of cork.
- Place the floating cork in a bowl of water.
- Watch as it turns and aligns north-south.
56. Step on Raw Eggs
This is one of those science activities that instantly grabs a preschooler’s attention. “Can I really step on eggs?” Surprisingly, yes! When eggs are arranged a certain way, their curved shape distributes weight evenly, preventing them from cracking. It’s a memorable way to explore force, shapes, and physical properties using an everyday item kids see in the kitchen.

Materials Needed:
- Towel (for cleanup, just in case)
- 2–3 dozen raw eggs in cartons (uncracked)
- Flat floor or surface
How to Make It:
- Place full cartons of eggs on the floor.
- Help the child carefully step evenly across the tops of the eggs.
- If done slowly and evenly, the eggs should not break.
- Discuss what made the eggs strong.
57. Pepper and Soap Experiment
This simple but powerful experiment visually demonstrates surface tension and how soap affects water molecules. It opens up conversations about hygiene and germs in a memorable, hands-on way. It also strengthens focus, prediction, and immediate cause-effect understanding.

Materials Needed:
- Cotton swab
- Bowl of water
- Ground black pepper
- Dish soap
How to Make It:
- Fill a shallow bowl with water.
- Sprinkle pepper across the surface.
- Dip a cotton swab in dish soap and touch the center of the bowl.
- Watch the pepper scatter instantly.
58. Nature Collage
This activity invites preschoolers to explore the outdoors and gather natural materials for an artistic science project. By collecting leaves, sticks, petals, seeds, and other treasures, children learn to identify textures, classify objects, and appreciate nature. Turning their finds into a collage helps blend creativity with observation.

Materials Needed:
- Leaves, twigs, flower petals, seeds (gathered from outdoors)
- Paper or cardboard
- Glue
How to Make It:
- Take a walk and collect natural items.
- Sort and observe the collected materials.
- Arrange them on paper and glue them into patterns or scenes.
- Label or describe what each item is.
59. Oxidation of Apples
Watching an apple turn brown might seem like everyday life—but it’s actually a fascinating chemical reaction. This experiment helps preschoolers explore oxidation, understand how air reacts with food, and test what slows the process down. It’s simple, visual, and incredibly satisfying for kids who love hands‑on comparison activities.

Materials Needed:
- Timer
- Sliced apples
- Lemon juice, water, soda, milk, and vinegar
- Cups or plates
How to Make It:
- Dip different apple slices into each liquid.
- Place them on plates or in cups labeled with the liquid used.
- Observe what happens over time (check after 1 hour, then again later).
- Note which apple slice stays freshest.
60. Bags of Ice Cream
Making ice cream in a bag is a delicious way to teach kids about freezing, temperature, and how salt affects ice. Preschoolers love shaking the bag, watching ingredients thicken, and tasting the sweet results. It’s science, sensory play, and dessert all wrapped into one joyful experience.

Materials Needed:
- Ice and ½ cup salt
- 1 small ziplock bag
- 1 large ziplock bag
- 1 cup milk or cream
- 2 tablespoons sugar
- ½ teaspoon vanilla extract
How to Make It:
- Mix milk, sugar, and vanilla in the small bag. Seal tightly.
- Place ice and salt into the large bag.
- Put the small bag inside the big one and seal.
- Shake for 5–10 minutes until the liquid freezes.
- Enjoy the homemade ice cream.
Preparing for Preschool Science Activities
Before diving into science experiments, it’s essential to create an environment that fosters curiosity, exploration, and safety. Here’s how to set the stage for successful preschool science activities.

Creating a Good Learning Environment
Children learn best when they feel safe, engaged, and encouraged. To create an ideal space for science experiments:
- Choose a dedicated learning area free from distractions.
- Keep materials easily accessible to encourage hands-on participation.
- Set up a mess-friendly zone by covering tables with newspaper or using trays.
- Encourage questions and exploration to spark curiosity.
Choosing the Right Experiment
Preschoolers thrive on simple, hands-on experiments that allow them to observe and interact with science directly. The best activities should:
- Be age-appropriate and safe for young learners.
- Use everyday materials found at home or school.
- Have a clear, observable result to keep children engaged.
- Involve minimal setup and cleanup for convenience.
Materials and Safety
Safety is crucial when conducting science experiments with young children. Always follow these guidelines:
- Adult supervision is required for all experiments.
- Use non-toxic, child-safe materials like baking soda, vinegar, and food coloring.
- Keep small objects away from children who may put them in their mouths.
- Have a clean-up plan ready, including wipes and paper towels.
Making Sure Children Are Involved
Hands-on learning is the best way for preschoolers to absorb scientific concepts. Encourage participation by:
- Letting children pour, mix, and observe during experiments.
- Asking open-ended questions like, “What do you think will happen next?”
- Allowing them to record their observations with drawings or simple words.
FAQs
1: What are the benefits of science activities for preschoolers?
Science and sensory activities help preschoolers develop foundational skills in observation, problem-solving, and critical thinking. These hands-on experiences nurture curiosity, fine motor skills, language development, and social-emotional growth. Activities like melting ice, building volcanoes, or growing seeds allow children to explore real-world concepts in a developmentally appropriate way, laying the groundwork for future STEM learning.
2: Are these science activities for preschoolers?
Yes — all activities are designed with age-appropriateness and safety in mind. Materials are typically non-toxic, household-based, and require minimal adult supervision. However, certain activities (like Elephant Toothpaste or those involving raw eggs or small objects) should always be conducted with close adult guidance to ensure safe handling and prevent choking hazards or accidental spills.
3: How do science activities for preschoolers support Montessori or Reggio Emilia learning environments?
Both Montessori and Reggio Emilia philosophies emphasize hands-on, child-led exploration — exactly what science and sensory activities provide. These experiments promote independent thinking, respect for natural phenomena, and open-ended inquiry. Whether it’s observing a bug, mixing vinegar and baking soda, or building with natural materials, these activities align perfectly with the values of purposeful play and discovery-based learning.
4: What materials do I need to get started with these science activities for preschoolers in my classroom?
Most activities use readily available, low-cost items, such as water, baking soda, food coloring, plastic containers, paper towels, or natural elements like leaves and sand. You can also create a science corner or sensory bin rotation using clear jars, trays, scales, magnifying glasses, and common kitchen tools. We recommend starting with versatile materials to cover a wide range of experiments and gradually adding specialized tools like magnets or pipettes as needed.
5: How can I keep children engaged during science activities for preschoolers?
To keep children actively engaged during science activities for preschoolers, it’s important to make each experiment hands-on, visual, and open-ended. Allow children to touch, observe, and test materials on their own. Use simple questions like, “What do you think will happen?” or “Why did that change?” to encourage critical thinking. Providing a variety of textures, colors, and reactions helps maintain interest, especially when paired with opportunities to draw, describe, or repeat the activity. Preschoolers are naturally curious—well-designed science activities for preschoolers build on that curiosity and turn it into meaningful, joyful learning.


