
Creating a safe, fun, and durable outdoor playground for children is no easy task. Especially when you need to build a playground that meets educational goals, safety regulations, and budget limits all at once. Many schools and contractors struggle to balance creativity with compliance, wondering where to begin and what materials or structures to choose.
Schools and developers often find themselves balancing multiple factors: safety compliance, accessibility, sustainability, and aesthetic design. Without clear guidance, it’s easy to overlook critical details that affect long-term usability and maintenance.
This article brings together everything you need to build a playground that combines fun with functionality. From choosing age-appropriate equipment to optimizing your layout and materials, we’ll help you create a play space that stands the test of time.

What is a Preschool Playground?
A preschool playground is a carefully designed play space for young children, typically aged 2-5. It focuses on safety, creativity, and developmental benefits, ensuring that kids can explore, climb, slide, and interact with sensory elements while staying within their physical limits. Preschool playgrounds are crucial for early childhood learning, promoting motor skills, social interaction, and imaginative play.
Safety is a top priority when designing a preschool playground layout. Soft flooring, enclosed spaces, and age-appropriate play structures help minimize risks while maximizing engagement. Schools, childcare centers, and Montessori programs often invest in custom-designed playgrounds to meet specific educational and developmental needs.
Key features of a preschool playground include:
- Low-height structures to prevent injuries.
- Soft surfacing materials like rubber mulch or artificial grass.
- Equipment that promotes both physical activity and creative play.
- Inclusive designs for children of all abilities.

8 Principles of Playground Design
When planning to build a playground, focusing on playground design principles that enhance safety, engagement, and inclusivity is essential. A well-designed playground isn’t just a collection of equipment—it’s an environment that fosters physical, social, and cognitive development. These eight key principles will help you create a fun and functional space.
1. Design for Different Types of Play
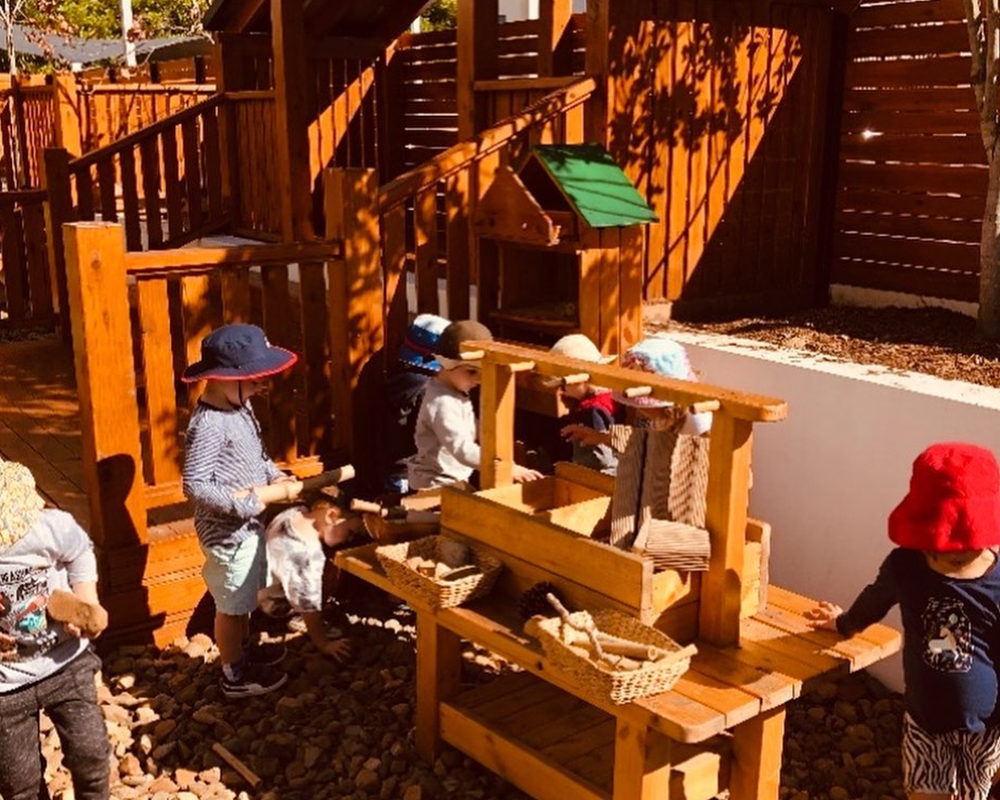
A playground should offer a mix of active, creative, sensory, and social play elements to support well-rounded child development. Creating a natural playground with diverse play zones encourages children to explore and interact in multiple ways.
- Active Play: Running, climbing, and jumping activities that enhance physical development.
- Social Play: Equipment like seesaws, carousels, and sandboxes promote teamwork and communication.
- Imaginative Play: Playhouses, themed structures, and interactive panels allow children to create their own stories.
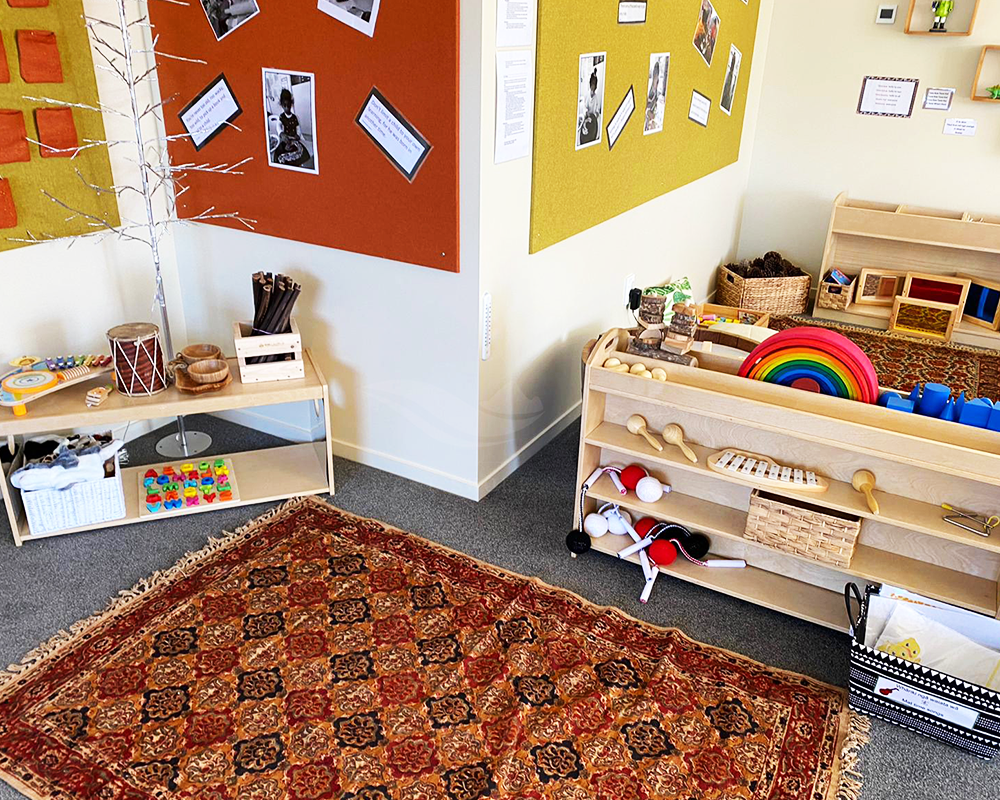
- Sensory Play: Textured surfaces, musical instruments, and water features engage children’s senses.
For example, Montessori playground design often integrates elements that foster independent problem-solving and discovery, while school playground designs should balance physical and social activities to support childhood learning.

2. Provide a Safe Environment
Safety should be the foundation of any building or playground project. A well-designed play area minimizes the risk of injuries, allowing kids to explore and take appropriate risks. Key safety considerations include:
- Surfacing: Soft materials like engineered wood fiber, rubber tiles, or artificial turf help absorb impact.
- Spacing: Ensuring enough room between equipment reduces the risk of collisions.
- Height Considerations: Age-appropriate height limits for slides, climbing walls, and swings help prevent falls.
- Barrier Protection: Guardrails, fences, and designated walkways enhance overall security.
- Clear Visibility: Parents and caregivers should have a clear line of sight in all playground areas.
- Regular Safety Checks: Plan routine inspections to ensure all components remain in excellent condition.

3. Encourage Children’s Creativity
Playgrounds should spark imagination and curiosity. Adding interactive elements like themed climbing structures, pretend-play stations, and chalk walls enhances creative play.
- Multi-use structures: Climbing frames that double as forts or bridges.
- Interactive panels: Alphabet walls, musical instruments, and problem-solving stations.
- Role-play areas: Playhouses, market stalls, or pirate ships that encourage storytelling.
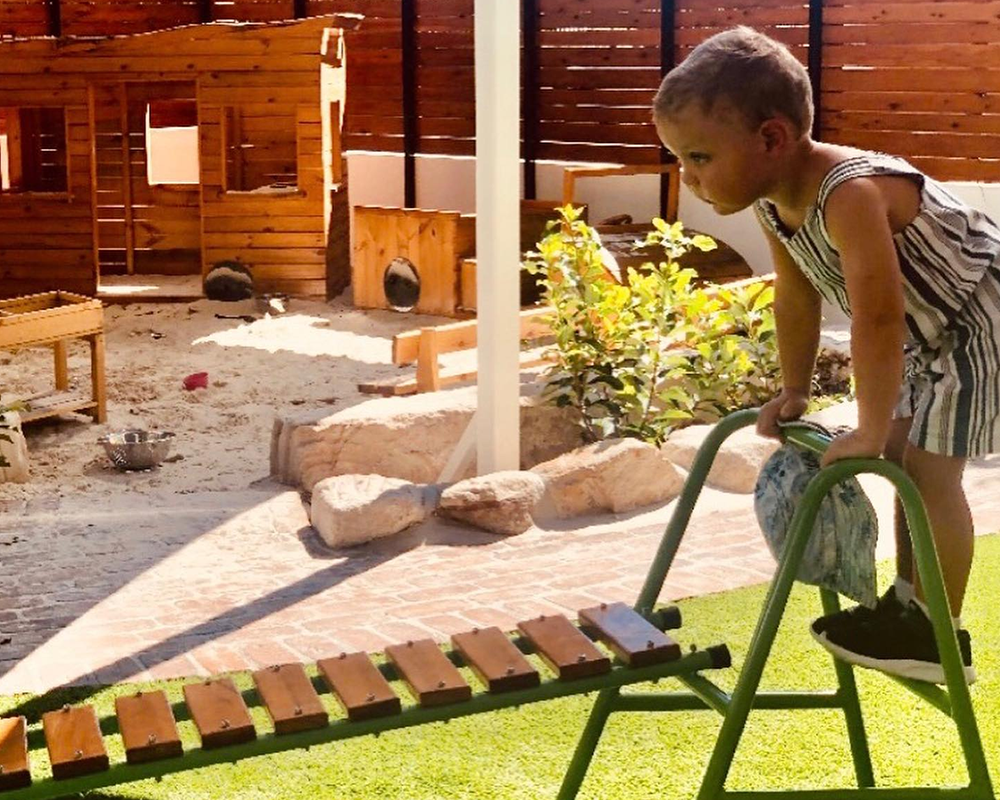
- Musical instruments (outdoor xylophones, drums)
- Themed play areas (pirate ships, castles, space stations)
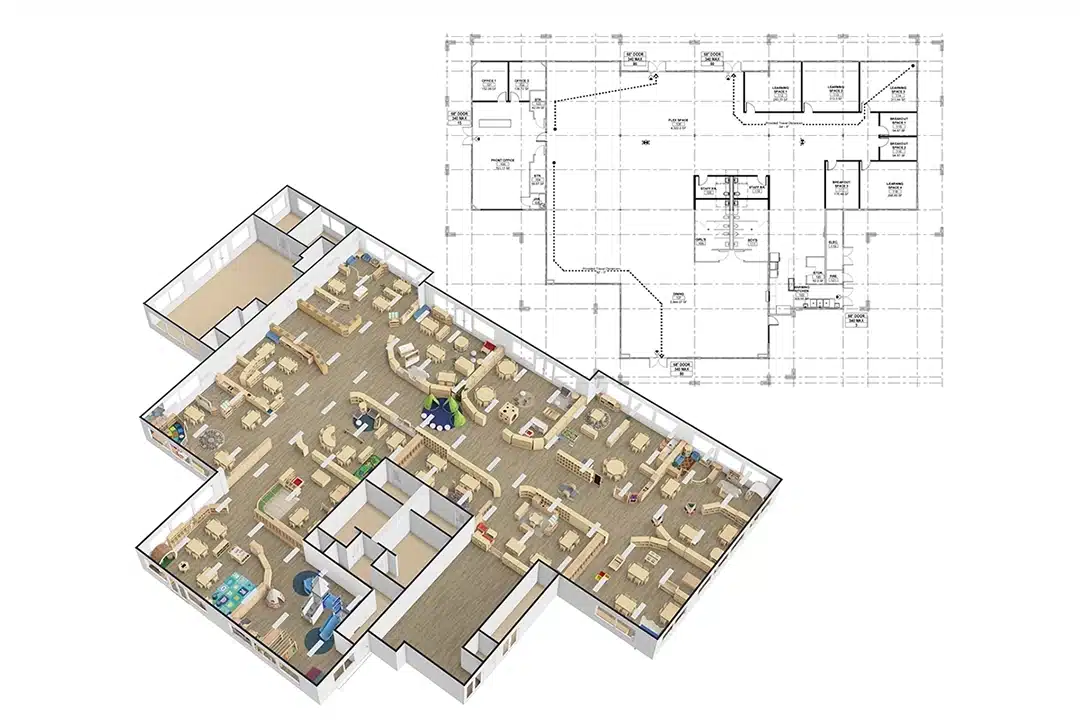
4. Plan the “Flow” of the Space
The layout of a playground significantly affects safety and usability. Consider the following when designing a preschool playground layout or any playground floor plan design:
- Zoning: Separate active play areas (swings, slides) from quieter activities (reading nooks, sand play).
- Traffic Flow: Paths and open spaces should allow easy movement without congestion.
- Sightlines: Caregivers should be able to see children at all times from different vantage points.
Good playground design ideas ensure children can move freely between play areas without bottlenecks or hazards.

5. Age Appropriateness
A playground should be tailored to the developmental needs of different age groups. When you design a playground, consider these categories:
- Toddlers (6-23 months): Low platforms, ramps, sensory elements, and bucket swings.
- Preschoolers (2-5 years): Small slides, crawl tunnels, and imaginative play elements.
- School-age children (5-12 years): Climbing structures, monkey bars, and obstacle courses.
For example, kindergarten playground design should include equipment that helps develop motor skills, like small climbing walls and balance beams, while building a natural playground for older kids may involve rope courses and rock walls.
6. Create Intersecting, Inclusive Spaces
Inclusive playground design ensures children of all abilities can participate. Important features include:
- Wheelchair-accessible ramps and wide paths.
- Swings with harnesses for children with limited mobility.
- Sensory play areas with textures, sound, and visual elements for children with autism or sensory sensitivities.
- Seating areas for caregivers and children who need breaks.

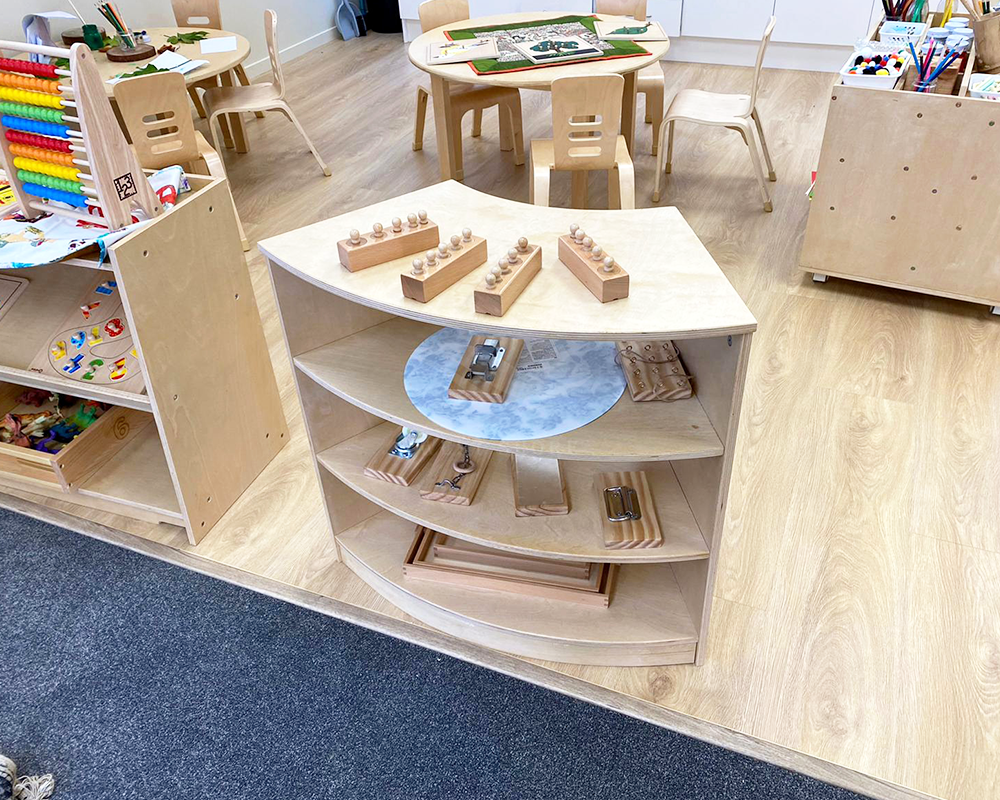
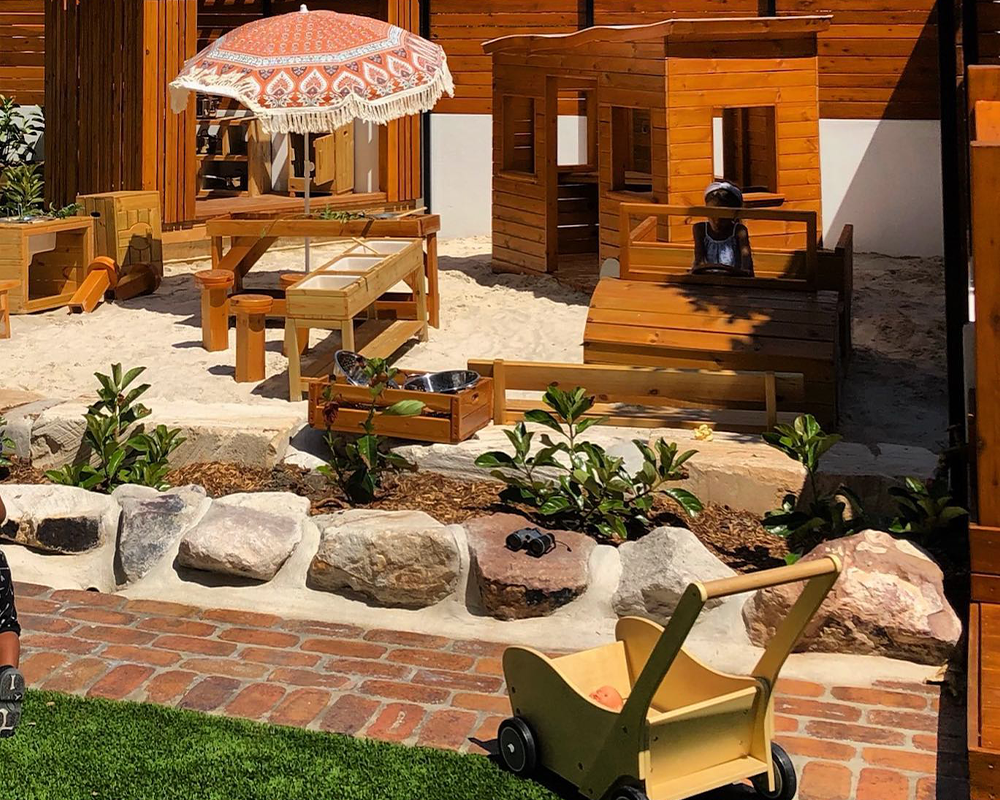
7. Landscaping and Nature Work
Building a natural playground integrates the environment into the play experience. Elements like trees, water, and rocks can enhance sensory and exploratory play.
- Use natural materials – Wooden climbing frames, log balance beams, and stone pathways.
- Incorporate greenery – Trees for shade, flower beds, and grassy hills.
- Add interactive elements – A garden where children can dig and plant seeds.
Creating a natural playground promotes eco-awareness and outdoor learning, enriching play.
8. Create Comfortable Spaces for Every Child
Not all children want to engage in high-energy activities all the time. A well-designed preschool playground layout should include quiet zones, shaded rest areas, and small gathering spaces where children can relax. Seating areas for caregivers and teachers also help create a welcoming atmosphere for everyone. These comfortable spaces make the playground more inclusive and enjoyable for energetic and introverted children.

Basic Considerations for Playground Planning
Designing a playground, whether from scratch or upgrading an existing space, isn’t just about throwing in a few swings and slides. It’s about developing a safe, inclusive, engaging, and sustainable environment where children can thrive. Before breaking ground or signing any contracts, several foundational considerations must be explored to ensure your playground meets legal requirements, serves its intended audience, and stands the test of time.
1. Playground Type
Selecting the appropriate playground type is the first practical choice you’ll make. The type determines scale, budget, required approvals, and expected life cycle.
- Neighborhood park playground
- School/playground for educational campus
- Early childhood center/playground for daycare or Head Start
- Backyard or private‑community playground
- Inclusive/adaptive playground
2. Children’s Age
Age matters. Playgrounds should be tailored to the physical and cognitive development levels of their target age group. In the U.S., most manufacturers and playground planners follow these standard age brackets:
- Toddlers (6–23 months): Require ground-level activities, smooth textures, and simple manipulatives.
- Preschoolers (2–5 years): Benefit from low platforms, interactive panels, and smaller slides.
- School-aged children (5–12 years): Need higher climbing structures, longer slides, and more challenging activities.
Mixing age groups without clear zones can increase the risk of injury. Smart layout design includes buffer spaces or signage to guide users and parents effectively.
3. Space Size
Before selecting any equipment, map out your space. Measure accurately and account for clear fall zones around each structure. Don’t forget areas for supervision, shade structures, or even future expansion.
- Each child needs at least 75–100 sq ft of play space to avoid overcrowding
- Minimum 6-foot safety buffer around all equipment
- ADA-compliant access paths must be factored in
4. New Construction or Renovation and Expansion
Are you building from the ground up or adding to an existing play area?
- New playgrounds give you complete freedom, but also require significant site preparation, utility checks, and city permitting.
- Renovations often need modular additions or surfacing upgrades, especially in older schools built before 2000.
In both cases, understanding your local municipality’s permitting and safety inspection process is critical. Many U.S. counties require inspection before use, especially if funded by grants.
5. When the Attraction Opens
Decide on an opening schedule for planning, permitting, and community engagement purposes:
- Seasonal considerations: In many U.S. climates, spring and late summer are preferred for ground crews and volunteer days. Winter construction can be costlier, slower, or impractical due to ground freeze.
- Programming tie‑ins: Align openings with school calendars, community events, or grant timelines to maximize publicity and usage.
- Phased openings: If funding is partial, consider building a core area first (e.g., swings and toddler zone), then expand over time.
6. Budget
Let’s be real: budget defines reality. You can’t build a $200,000 playground on a $20,000 budget, but smart planning helps stretch every dollar.
Break down your budget like this:
| Category | % of Budget (Approx.) |
|---|---|
| Equipment | 50% |
| Surfacing | 15% |
| Installation/Labor | 20% |
| Design & Permits | 10% |
| Contingency (Unforeseen) | 5% |
Also, factor in long-term maintenance costs. Choosing cheaper materials may save up front but cost more in repairs and replacements.
7. Analyzing the Playground Situation
Before committing to a design, perform a thorough site analysis. This reduces unexpected costs and safety hazards later. Below are the subfactors to evaluate.
Slope
Slopes influence drainage, accessibility, and the ability to install level play surfaces.
- Ideal condition: Level or gently sloping terrain (generally under 5% slope) makes surfacing installation and ADA access easier.
- Steep sites: May require retaining walls, terracing, or creative use of topography (hill slides, stepped play areas). Retaining walls and cut/fill operations increase costs and require engineered plans.
- Erosion risk: On slopes, design runoff channels and erosion control (geotextiles, planted buffers).
Soil Type
Soil impacts everything from drainage to installation difficulty. Sandy soils drain well but may shift, while clay-heavy soils can retain water and cause foundational instability.
In the U.S., soil tests are often required for commercial projects and highly recommended even for residential builds. Don’t skip this step.
Weather Conditions
Rainy regions need fast-drying surfaces. Hot areas must avoid metal surfaces and instead use UV-stable plastics and shaded structures. In snowy climates, frost heave must be accounted for when anchoring equipment.
Ground Conditions
Are there buried utilities? Underground cables or water lines can halt your project instantly. Before digging, use the national Call 811 service to check for underground utilities—it’s free and legally required in most U.S. states.
Nearby Facilities
Is your playground next to a road, fence, or building? You’ll need safety barriers or additional fall zones. Proximity to noisy HVAC systems or dumpsters may reduce the quality of the play experience. Try to position your playground to maximize visibility and safety.
Nearby Vegetation
Large trees offer great natural shade but might drop branches or attract bees. Nearby grass might require increased pest control and maintenance. Plan your landscaping to complement—not compete—with the playground layout.

Steps to Build a Playground
Building a playground requires a structured process that includes careful planning, budgeting, legal compliance, and a commitment to long-term safety and engagement.
The following outlines the most important steps in playground construction, drawing on insights from experienced contractors, school districts, municipal case studies, and industry safety standards.
Step 1: Develop a Playground Project Plan
The foundation of any great playground is a clear, documented plan. Think of this step as your project’s “north star.” Without it, delays, miscommunication, and blown budgets are almost guaranteed.
- Stakeholders involved (e.g., school board, city council, PTA)
- Target age groups (e.g., 2–5, 5–12, mixed ages)
- Accessibility goals (e.g., ADA compliance, inclusive play)
- Vision for play types (active, creative, sensory, quiet zones)
- Initial ideas for themes, colors, or materials
- Timeline expectations (planning vs. build-out)

Step 2: Select a Site
Choosing the right site goes beyond convenience. Factors like sun exposure, wind patterns, proximity to roads, noise levels, and accessibility need to be weighed carefully.
A good rule of thumb: if you wouldn’t want to sit there for an hour while watching kids play, it’s probably not a good site.
The best sites for playgrounds typically:
- Have good drainage
- Are easily accessible to children and staff
- Are visible for supervision and protected from road traffic
- Have a buffer zone from utilities, waste areas, or mechanical equipment
Step 3: Obtain Local Approvals
Before ordering equipment or breaking ground, check your local codes and zoning regulations. Approvals differ depending on your state, city, and whether the land is public, private, or institutional.
In the United States, building a playground, especially on public or community land, usually requires a series of approval procedures. The following are the procedures that are usually required:
- Zoning approval
- Environmental impact assessments (if applicable)
- ADA accessibility documentation
- Building and safety permits
- Utility marking and clearance (through Call 811)
Start this process early. In many counties, permit approval can take 30–90 days. Delays in permits can put your entire project at risk, especially if you’re relying on seasonal weather to complete installation.

Step 4: Determine a Budget
Budgeting is where many well-intended playground projects stumble. Either costs are underestimated, or funds are misallocated. To avoid surprises, clearly divide your budget into each area where it is needed. Add a 15–20% contingency line item to cover unexpected expenses, especially with outdoor construction.
Step 5: Select a Playground Equipment Company
The vendor you choose will either make or break your project. Do your homework.
Ask these questions:
- Are they certified to ASTM and CPSI standards?
- Can they customize to your space and child age group?
- Do they offer installation support or guidance?
- Can they meet your delivery timeline?
- What’s their warranty and post-sale support?
Ask the company for recent case studies or photos of playgrounds similar to yours. If you’re building in a humid Southern state, ask how their materials hold up in high heat and moisture. If you’re in a snowy region, confirm frost protection and anti-slip surfacing.
Our factory in China works exclusively with kindergartens and early learning centers, so we understand the unique safety, scale, and aesthetic requirements of playground spaces.


Step 6: Playground Design
This is where your project comes to life. Good playground design balances fun, function, safety, and inclusivity.
- Layout drawings and 3D renders
- Equipment selection based on play types (physical, social, cognitive)
- Surfacing design and accessibility paths
- Shade and seating plans
- Safety zone clearances
- Age zone separation
Great design isn’t about cramming in the most equipment. It’s about flow, engagement, and safety. Playgrounds should allow children to roam freely without bottlenecks or danger zones.
Step 7: Determine the Best Material for the Equipment
The material choice impacts durability, maintenance, and safety.
| Material | Pros | Cons | Best For |
|---|---|---|---|
| Metal | – Extremely durable and long-lasting. – Resistant to weather conditions. – Can support heavy usage. | – Heats up in direct sunlight. – Prone to rust if not treated properly. – Requires regular maintenance. | – Public parks with high traffic. – Schools and community centers. – Commercial playgrounds requiring durability. |
| Plastic | – Lightweight and safe for younger children. – Available in bright, engaging colors. – No risk of rust or splinters. | – Less durable compared to metal or wood. – Can crack or fade over time. – May not support heavier children or high-impact play. | – Toddler and preschool playgrounds. – Indoor play areas. – Daycares and Montessori playgrounds. |
| Wood | – Provides a natural, aesthetic look. – Blends well with natural playground design. – Can be customized for custom-designed playgrounds. | – Requires regular maintenance (sealing, painting). – Can develop splinters over time. – Susceptible to weather damage and termites. | – Natural and eco-friendly playgrounds. – Backyard or residential playgrounds. – Themed playgrounds with rustic or forest elements. |
Step 8: Set Project Start and Deadline Dates
You should treat your playground like a construction project—because it is one.
Set the following dates:
- Design freeze
- Order placement
- Equipment production timeline
- Shipping and customs clearance
- Site prep
- Equipment arrival
- Installation start
- Final inspection
- Official opening
Leave at least a 2-week buffer between expected completion and your playground’s grand opening. Weather, delays at customs, or contractor schedules can shift.

Step 9: Prepare the Installation Site
Site preparation is a critical step that directly affects both the safety and longevity of your playground. It’s also the step where many DIY and budget-conscious projects make costly mistakes.
Before installation:
- Clear the area of debris, old structures, and tree roots.
- Excavate the site based on equipment specifications, typically 12–18 inches deep.
- Level the ground or sculpt it according to the layout plan.
- Install drainage systems if necessary—especially in regions with heavy rainfall or clay-based soil.
At this stage, it’s also smart to run underground utilities if you plan to include lighting, sprinkler systems, or water features. Failing to do so before surfacing can lead to expensive rework later.
Step 10: Install the Playground
With site prep complete and your equipment on hand, installation begins. If you hired a certified contractor, they’ll manage this phase.
If you’re doing a community build, organize the following:
- Safety briefings
- Task delegation by skill level
- Food/water for volunteers
- Supervisor or foreman with playground installation experience
- Inspection of anchors, connections, and fasteners during and after build
Each play component must be secured per manufacturer specifications, usually requiring:
- Concrete footings
- Torque-wrench tightening
- Ground-level alignment
- Surfacing depth verification
Once all parts are installed, schedule a Certified Playground Safety Inspector (CPSI) walkthrough if required in your jurisdiction.

Step 10: Promote Your Playground
Once the playground is complete, don’t just open the gate and wait. Use this opportunity to promote your school or program.
Here are some ideas:
- Ribbon-cutting event: Invite media, community leaders, and local families
- Donor wall or commemorative plaques: Acknowledge contributions and sponsors
- Social media launch: Share before/after photos, drone flyovers, or timelapse videos
- Local press coverage: Submit press releases or invite a local reporter
- Community celebrations: Host a family day with food trucks, music, or games
- Signage: Post rules, safety tips, hours of operation, and emergency info
If you’re in a competitive market, your playground can be a strong enrollment driver. Use it as a showcase for your school’s values and investment in child development.
Step 11: Maintain the Playground
Last but not least, maintenance.
Even the best equipment needs care to stay safe and clean. Here’s what a basic maintenance schedule should include:
Daily/Weekly:
- Clear debris or trash
- Check for vandalism or wear
- Inspect moving parts
Monthly:
- Tighten bolts and check anchors
- Inspect surfacing for displacement or damage
- Sanitize high-touch areas (especially in toddler zones)
Annually:
- Conduct a full safety inspection
- Replenish loose-fill surfacing
- Replace worn-out parts
- Check for updated safety regulations
We provide a maintenance checklist with all our furniture and playground packages. It’s a small effort that can save thousands in repairs—or worse, lawsuits.

Types of Playground Equipment
You need the right mix of playground equipment to build a playground that keeps children engaged.
Slides
One of the most popular playground staples, slides come in different shapes and sizes, including straight, spiral, and tunnel slides. They help develop balance and spatial awareness.
Swings
Swings provide a thrilling sense of motion while improving balance and core strength. Options include belt swings, bucket swings for toddlers, and inclusive swings for children with disabilities.
Climbing Frames
Climbing frames, which range from simple ladders to complex jungle gyms and rope courses, are great for building upper-body strength and coordination.
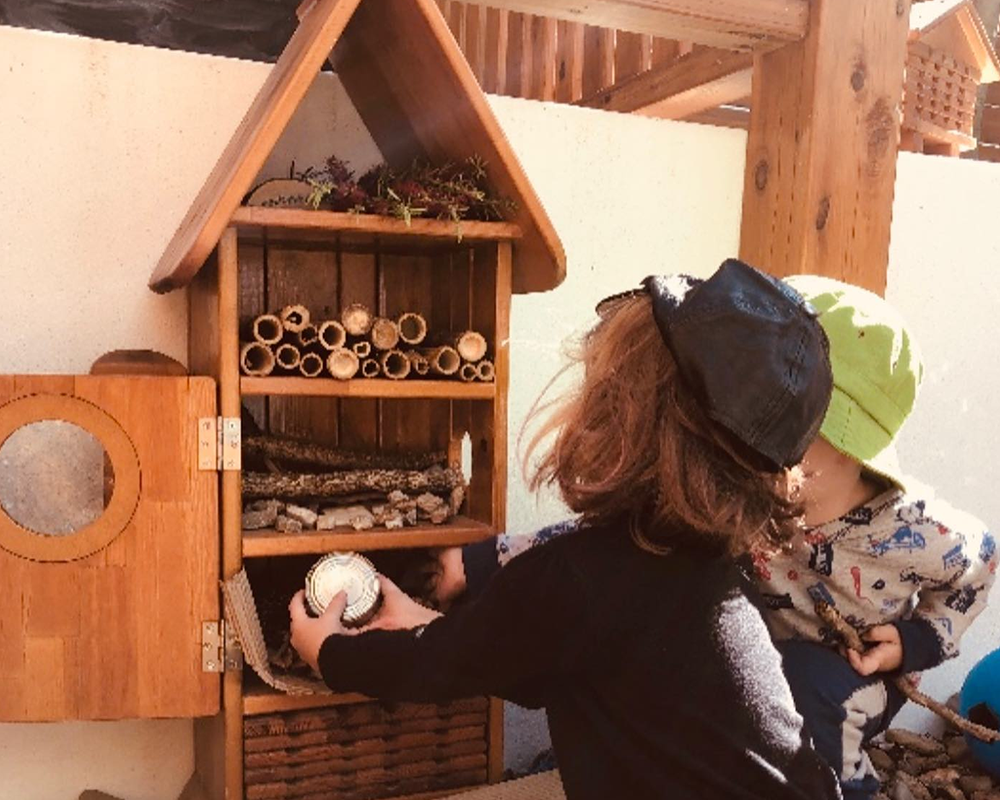
Sensory Panels
Interactive panels with puzzles, musical elements, and textures stimulate cognitive and sensory development. These are especially beneficial for younger children and kids with sensory processing needs.
Carousel
Merry-go-rounds promote social interaction and teamwork as children spin together. Modern designs include wheelchair-accessible options for inclusivity.
Horizontal Bar
Ideal for older children, horizontal bars help improve upper body strength and coordination while promoting active play.
Seesaw
A classic playground piece, seesaws encourage teamwork and cooperation as children work together to balance and move up and down.
Sandbox
Sandboxes are a timeless favorite. They provide open-ended play opportunities that enhance creativity, fine motor skills, and sensory exploration.
Materials to Consider When Creating a Playground
The right materials improve playground safety and longevity.
Playground Surface Treatment
Safety playground surface materials reduces injury risks from falls.
- Loose Fill: Includes sand, wood chips, or rubber mulch.Affordable but requires regular replenishment.
- One-Piece Flooring: Made of synthetic rubber. Durable and easy to clean.
- Poured in Place (PIP): Mixed rubber and adhesive poured on-site. Highly impact-absorbent but expensive.
- Rubber Tiles: Pre-cut rubber squares placed over the ground. Good shock absorption and is easy to install.
- Concrete Asphalt: Hard and durable but lacks shock absorption. Best suited for bike paths, not play areas.
Playground Mats
- Great for high-traffic areas under swings and slides.
- Prevent erosion and add extra cushioning.
FAQs
- What is the average cost to build a playground?
Costs vary but typically range from $10,000 to $50,000 depending on size and materials. - How long does it take to install a playground?
Installation can take anywhere from a few days to a few weeks based on complexity. - What is the safest playground surface?
Rubberized surfaces and engineered wood fiber are among the safest. - How can I make a playground more inclusive?
Include wheelchair-accessible ramps, sensory play areas, and adaptive swings. - Do I need a permit to build a playground?
Yes, most public and school playgrounds require permits and inspections. - How can I fund a playground project?
Look into grants, crowdfunding, and local sponsorships.
Conclusion
Building a playground is a rewarding investment that fosters fun, socialization, and physical activity for children. By carefully planning the location, selecting the right equipment, ensuring safety measures, and budgeting wisely, you can create a safe and enjoyable play space for all. Whether constructing a small backyard playset or a large community park, these guidelines will help you build a playground that children will love for years.


