Many teachers run into the same situation the first time they introduce a light table in the classroom: children are genuinely excited at first, but after ten minutes they start scattering the materials, or they keep repeating the same thing, “Let’s put it on and see if it lights up.”
The real value of a light table isn’t the glow itself. It’s how the light makes colors, shapes, shadows, and small details easier to see, helping children naturally move into observing, sorting, matching, and expressing what they notice.
If you already have a light table in your classroom, you might feel that you are using it for the same two or three activities over and over. You know it could be a powerful tool for learning, but it is not always easy to think of fresh, simple light table activities for preschool that are more than just “pretty to look at.”
In this guide, you will find practical light table activities for preschool that you can start using this week. Each idea comes with suggested materials, simple steps, and a short note on the learning goals it supports, so you can confidently blend play and learning in your daily routine.
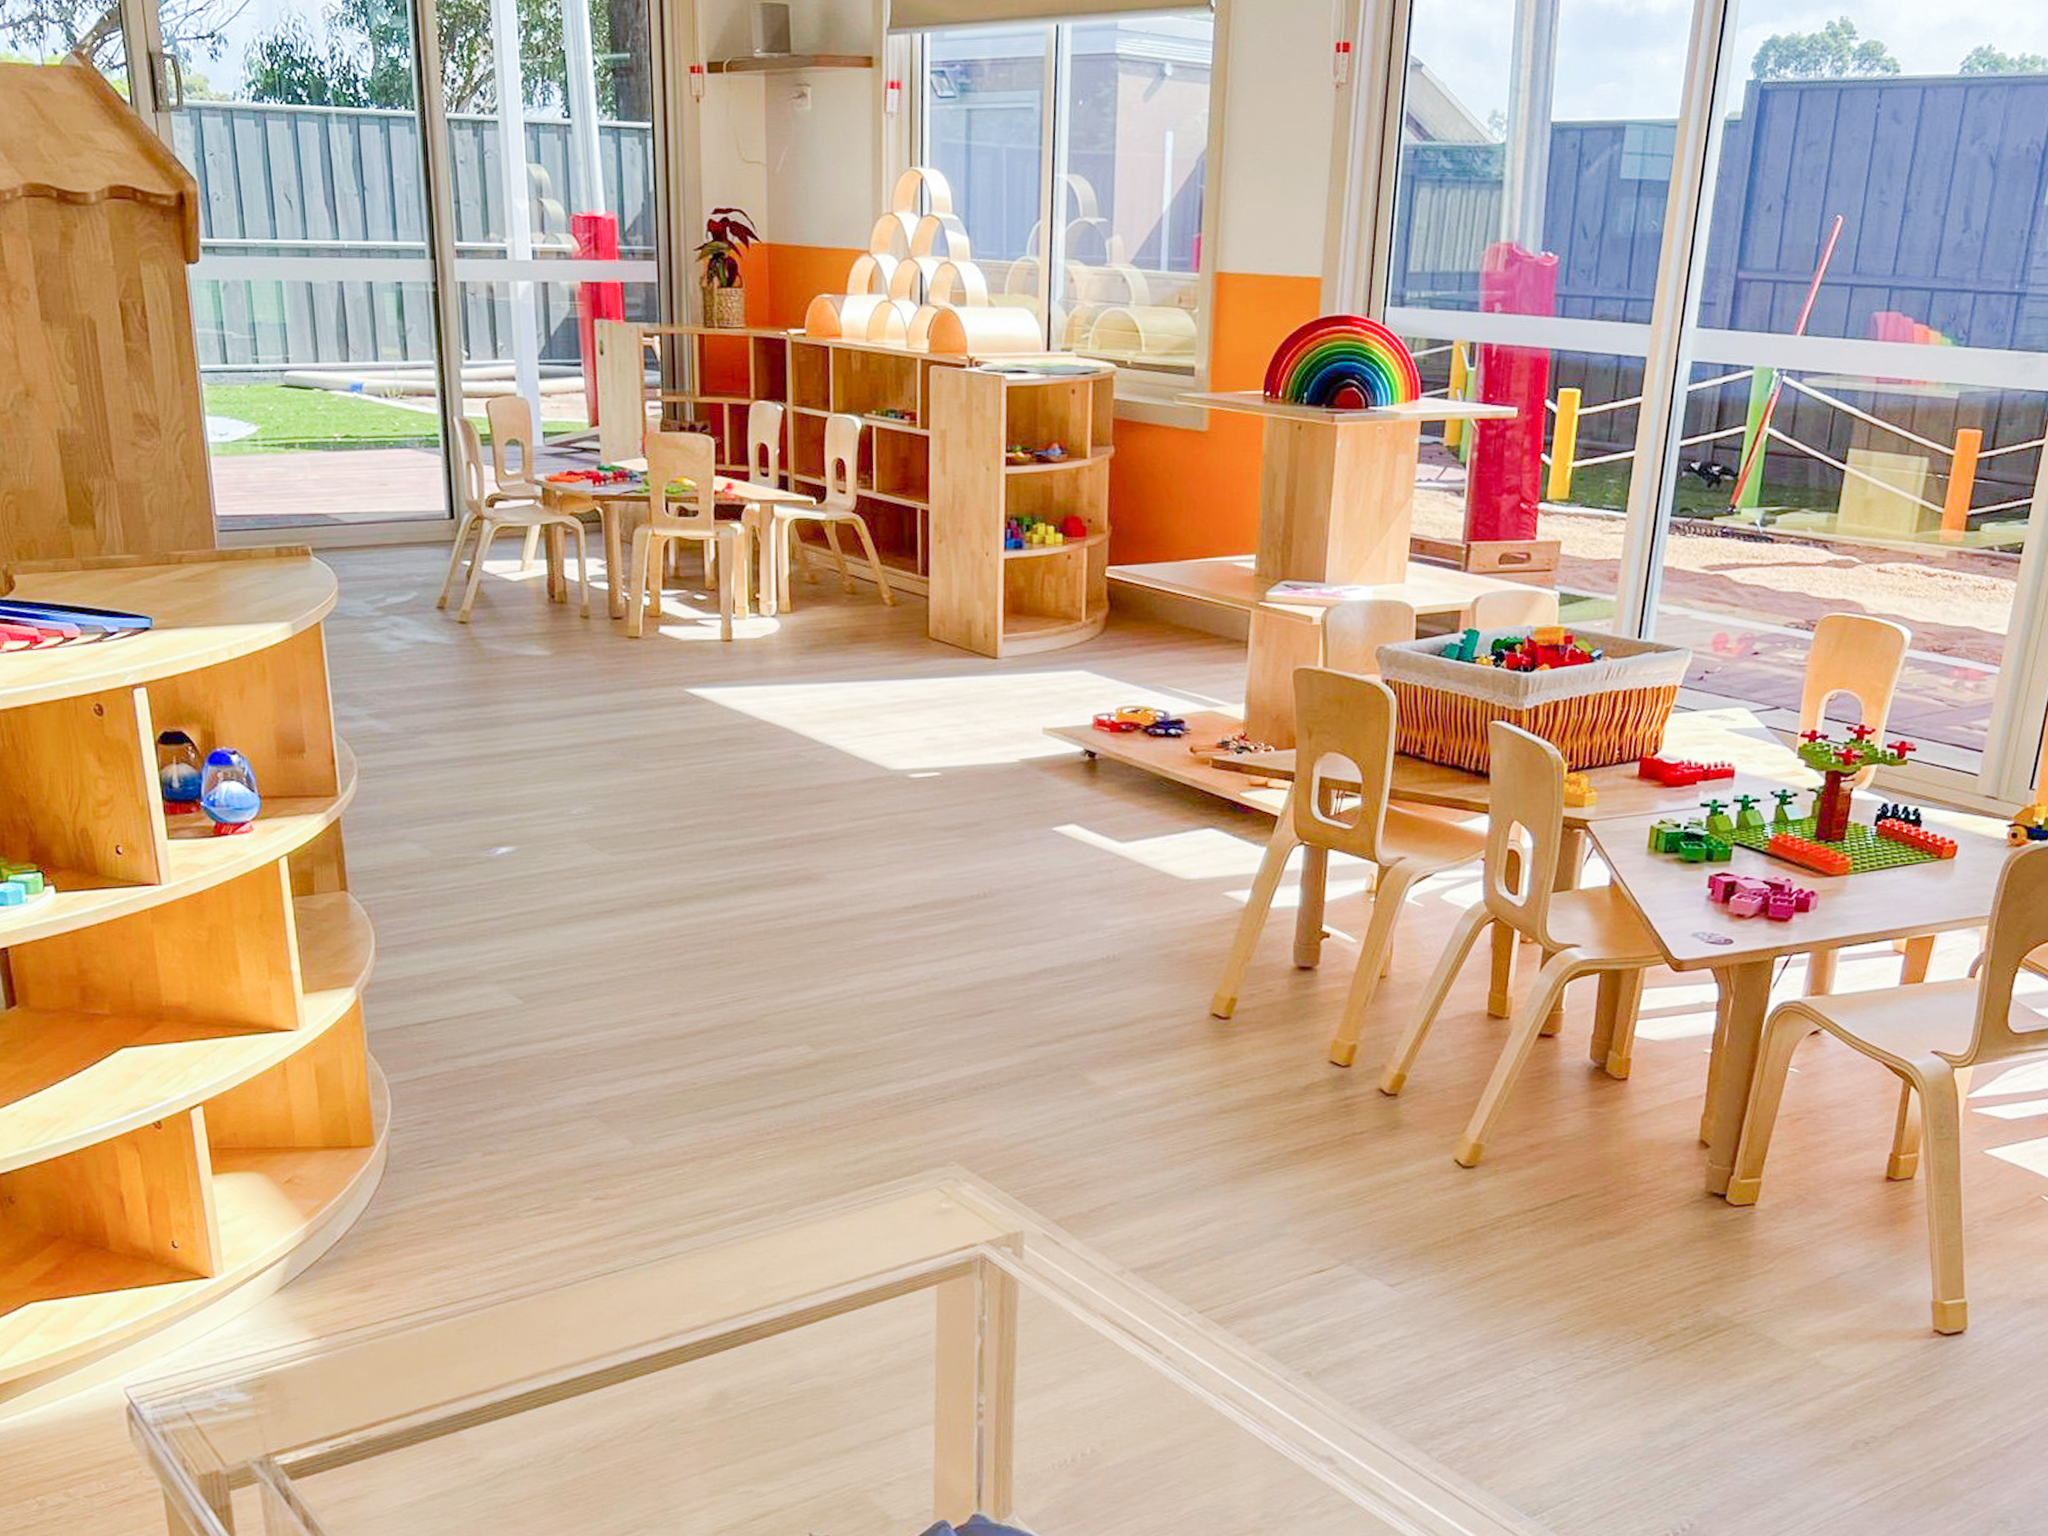
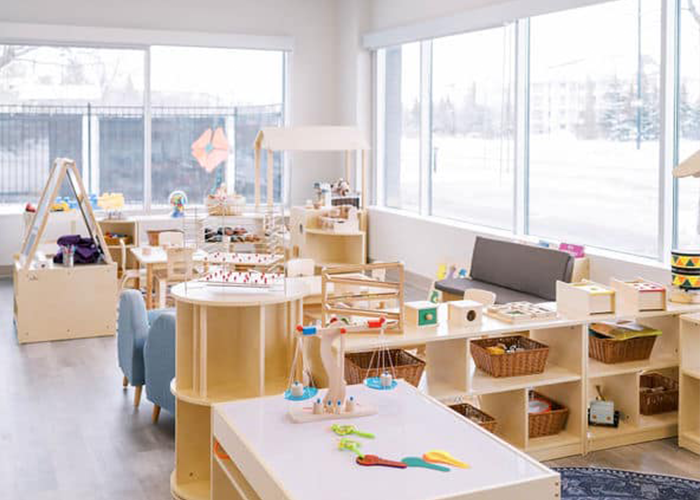
Benefits of Using Light Tables in Preschool Classroom
Early childhood experts highlight that light tables can support diverse learners, enhance fine motor skills, and foster creativity and imagination when used regularly. They are especially helpful for children who benefit from strong visual input or who struggle to focus in noisier, more cluttered areas of the room. With the background dimmed and the table glowing, distractions fade and children naturally slow down and concentrate.
At the same time, light tables are incredibly versatile. You can use them to:
- introduce or review letters, numbers, and shapes
- sort and classify objects by color, size, or other attributes
- explore science concepts like transparency, opacity, and shadow
- practice patterning, counting, and subitizing
- encourage storytelling, mark-making, and early writing
In Reggio-inspired classrooms and many high-quality preschool programs, the light table is treated as a mini-laboratory where children investigate, test ideas, and represent what they notice. When you choose your light table activities for preschool carefully, you invite children to ask questions, predict outcomes, and talk about what they see and feel.
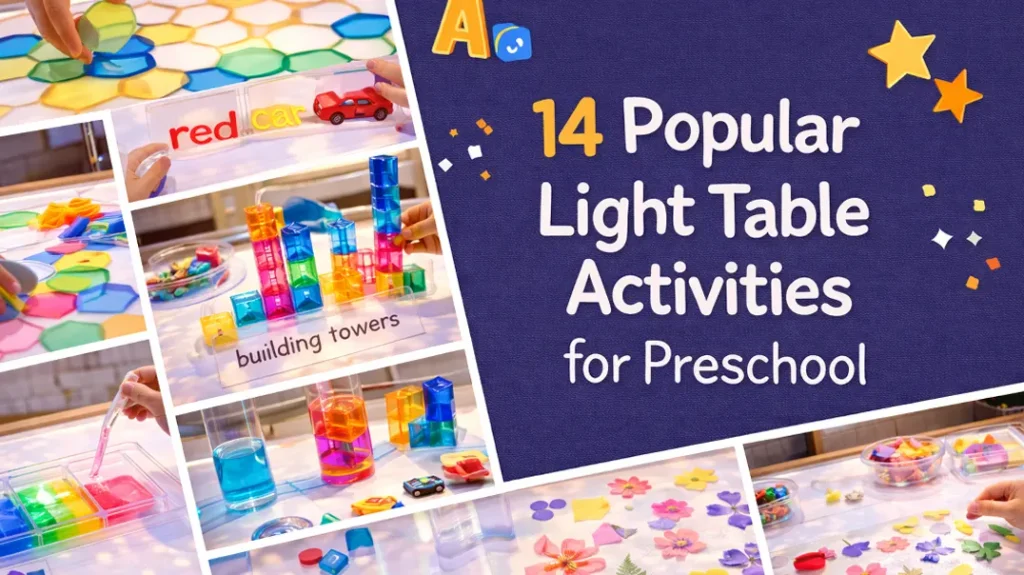
Light Table Activities for Preschool That Actually Engage Children
Below are 14 tried-and-true light table activities for preschool that balance simplicity, educational value, and genuine child interest. For each one, you’ll see the learning focus, suggested materials, and tips for differentiation.

1. Color Sorting With Transparent Counters
Color sorting on the light table is simple, beautiful, and surprisingly calming. Children are drawn to the glowing colors and will often stay focused far longer than they do at a regular table. This is one of those light table activities for preschool that feels like play but builds real early math foundations.
Suggested Materials:
- Transparent plastic counters, gems, or flat marbles in several colors
- Small clear bowls, cups, or sorting trays
- Optional: clear plastic sheets or laminated “sorting mats” with colored circles or shapes
Simple Steps:
- Place the transparent counters in one shallow container in the middle of the light table.
- Arrange several clear bowls or color-coded sorting spots around the edge.
- Invite children to sort the gems by color. You might say, “Can you make a bowl of only red gems?”
- Once they are sorting confidently, add gentle challenges: “Which color has more?” “Can you make a rainbow line?”
- Light table
Learning Goals:
- Recognize and name colors
- Develop early math skills: sorting, comparing quantities, describing “more” and “less”
- Practice fine motor control by picking up and placing small objects
- Build vocabulary through simple math and color words

2. Letter Hunt With Transparent Alphabet Tiles
This activity turns the light table into a glowing invitation to explore letters, names, and sounds. Children love searching for “their” letters, and the illuminated surface makes each discovery feel special. It’s a gentle way to weave literacy into play, especially for children who are just beginning to notice letters.
Suggested Materials:
- Transparent alphabet tiles or see-through plastic letters
- Clear cups or small containers (one per child or per letter)
- Optional: laminated name cards or clear strips with children’s names printed on them
Simple Steps:
- Scatter the transparent letters across the light table.
- Place a cup or tray in front of each child, labeled with their name or target letter.
- Invite children to hunt for the letters in their names and place them in their cups.
- As they play, say the letter names and, when appropriate, the sounds: “You found ‘M’ for Mia. M says /m/.”
- For children ready for more challenge, ask them to build simple words (cat, dog, mom) or match letters to small picture cards that start with that sound.
Learning Goals:
- Recognize and name letters, especially those in children’s own names
- Begin to connect letters to their sounds
- Strengthen visual scanning and attention to detail
- Build confidence and enjoyment around early literacy

3. Number Tracing With Dry-Erase Sheets
On the light table, numbers seem to glow from within, guiding children’s fingers and markers along the correct path. This makes number tracing feel less like a worksheet and more like a special drawing activity. It’s a low-pressure way to introduce numeral formation in a sensory-rich environment.
Suggested Materials:
- Printed numeral tracing sheets (large, clear numbers)
- Transparent dry-erase pockets or laminated clear sleeves
- Dry-erase markers or grease pencils
- Optional: laminated ten-frame cards or simple counting images
Simple Steps:
- Slide numeral tracing sheets into the clear dry-erase pockets.
- Place them on the light table so the numbers are clearly illuminated.
- Give each child a marker and invite them to trace the glowing numbers. Model starting points if needed.
Learning Goals:
- Recognize numerals and practice correct numeral formation
- Strengthen fine motor control and hand–eye coordination
- Connect numerals to quantities through simple counting
- Build persistence and confidence in early math tasks

4. Shadow Stories With Silhouettes
This activity turns the light table into a tiny stage. Children bring stories to life using simple silhouettes, combining imagination with visual drama. It’s a beautiful way to support language development and storytelling in a medium that feels magical and low-pressure.
Suggested Materials:
- Silhouette cutouts of people, animals, trees, and simple objects (black cardstock or plastic)
- Clear plastic sheets or stands to prop figures if needed
Simple Steps:
- Place a set of silhouette characters and objects on the light table.
- Invite children to choose a few pieces and arrange them to create a “scene.”
- Encourage them to tell what is happening: “Who is this? Where are they going?”
- If possible, record or write down their story as they tell it, then retell it together using the silhouettes.
Learning Goals:
- Develop storytelling and narrative skills (beginning, middle, end)
- Expand vocabulary and expressive language
- Practice turn-taking and listening as children share the space and story
- Foster creativity and imagination through open-ended play

5. Sensory Bags on the Light Table
Sensory bags combine the soothing feel of squishy materials with the soft glow of the light table. This is especially helpful for children who need calming input, as they can press, squeeze, and trace without making a mess. It’s a gentle way to invite pre-writing movements and sensory exploration.
Suggested Materials:
- Strong zippered plastic bags
- Hair gel, water beads, or colored water and glitter
- Tape to seal edges securely
- Small flat sequins, foam shapes, or plastic letters inside the bags
Simple Steps:
- Prepare sensory bags in advance: fill each bag with gel or beads, remove excess air, and tape the edges shut.
- Place the bags directly on the light table surface.
- Invite children to press, push, and move the contents around. Suggest shapes: “Can you draw a circle?”
- For added literacy, hide a few flat letters inside and ask children to “find” and trace them.
- When finished, wipe the bags and store them in a basket for next time.
Learning Goals:
- Provide calming sensory input and help children regulate their bodies
- Develop pre-writing strokes (lines, circles, curves) in a low-pressure way
- Build vocabulary for textures and sensations (“squishy,” “smooth,” “bumpy”)
- Encourage focus and sustained attention during quiet play

6. Simple STEM: Building With Transparent Blocks
Building with transparent blocks on a light table feels like constructing with glowing glass. Children experiment with balance, height, and shape, all while the light adds an extra layer of interest. This activity naturally invites collaboration and problem-solving.
Suggested Materials:
- Transparent building blocks or magnetic tiles
- Small translucent people or animals to include in structures
- Simple “challenge cards” with pictures of structures to try copying
Simple Steps:
- Place a selection of transparent blocks on the light table.
- Invite children to build anything they like—towers, houses, bridges, or entire “cities.”
- Offer gentle challenges: “Can you build something as tall as your hand?” “Can you make a bridge from one side to the other?”
- When they finish, ask them to tell you about their structure before it’s taken down.
Learning Goals:
- Develop spatial reasoning and early engineering skills
- Practice experimenting, testing, and revising ideas
- Strengthen cooperation and communication during shared building projects
- Explore color mixing and light effects in a hands-on way

7. Transparent Geoboards and Rubber Bands
Geoboards on the light table add a glow to every line children create. Stretching rubber bands builds hand strength and coordination, while the shapes formed support early geometry skills. It’s a satisfying challenge that many children return to again and again.
Suggested Materials:
- Transparent geoboards (or clear boards with pegs)
- Colorful rubber bands (child-safe size and strength)
- Simple shape cards for children to copy (triangle, square, rectangle, etc.)
Simple Steps:
- Place transparent geoboards on the light table with a small bowl of rubber bands.
- Show children how to stretch a band between two pegs to make a straight line.
- Invite them to create basic shapes, starting with simple ones and building complexity.
- Offer shape cards as inspiration for children who enjoy a challenge.
Learning Goals:
- Strengthen fine motor skills and finger strength
- Explore basic geometric shapes and spatial relationships
- Build vocabulary around shape names and attributes

8. Matching Games With Transparent Picture Cards
Matching games on the light table feel special because the images glow and stand out clearly. This activity is great for vocabulary building and visual memory, and it’s easy to adjust for different ages by changing how many cards you use or how you present them.
Suggested Materials:
- Transparent picture cards in pairs
- Transparent word cards for advanced children to match to pictures
- Small clear containers or frames to keep sets organized
Simple Steps:
- Place a small set of transparent picture cards on the light table, face-down or face-up depending on children’s level.
- For beginners, invite children to simply match two identical pictures.
- For older preschoolers, play a simple memory game: flip over two cards at a time and try to find pairs.
- Rotate themes (animals, vehicles, foods) to connect with your current units.
Learning Goals:
- Strengthen visual discrimination and memory
- Practice turn-taking and simple game rules
- Develop concentration and attention span

9. Water Bead Science Trays
Water beads on a light table feel like tiny glowing planets. Children can’t resist touching them, scooping them, and watching them roll and bounce. With careful supervision, this becomes a rich little science lab.
Suggested materials
- Light table
- Fully hydrated water beads (prepared in advance according to instructions)
- Shallow clear trays or dishes
- Clear cups, scoops, and spoons
- Magnifying glasses
Simple steps
- Spread a single layer of water beads in shallow trays.
- Place the trays on the light table so the beads glow from below.
- Add cups, scoops, and spoons for pouring and transferring.
- Invite children to explore freely at first, then ask gentle questions: “What happens when you pour them?” “How do they look if you squish them?”
- Offer magnifying glasses so children can observe texture and transparency more closely.
Learning goals
- Sensory exploration and hand-eye coordination
- Describing properties (smooth, squishy, round, slippery)
- Observing cause and effect (pouring, squishing, bouncing)
- Using simple science language and making predictions

10. Pre-Writing Trays With Glowing Sand or Salt
Writing in sand or salt feels playful and low-pressure, especially when the lines glow softly from underneath. Children can practice important strokes and letters without worrying about making “mistakes” on paper.
Suggested materials
- Light table
- Shallow clear trays or baking dishes
- Fine colored sand, table salt, or tiny beads (just enough to cover the bottom)
- Fingers, paintbrushes, or blunt styluses
Simple steps
- Fill each tray with a very thin layer of sand or salt.
- Place the trays on the light table.
- Show children how to gently shake the tray to “erase” marks and start fresh.
- Invite them to draw lines, shapes, and later letters using fingers or tools.
Learning goals
- Practicing essential pre-writing strokes (lines, curves, zigzags, circles)
- Building fine motor control and wrist movement
- Letter exploration in a stress-free way
- Sensory engagement that supports focus and attention

11. Colored Water and Droppers
Colored water on the light table is pure magic. The glowing cups and gentle drip of droppers invite children to slow down, focus, and experiment. This activity is especially loved by children who enjoy hands-on, sensory-rich experiences and helps build the fine motor strength they need for writing later on.
Suggested Materials:
- Small clear cups or jars
- Water tinted with liquid watercolors or food coloring (a few different colors)
- Plastic droppers or pipettes (child-safe)
- Clear trays or shallow dishes on the light table to catch spills
- Paper towels or sponges for easy cleanup
Simple Steps:
- Fill several clear cups with colored water in different hues.
- Place the cups on the light table inside a shallow clear tray to contain drips.
- Offer each child a dropper and show them how to squeeze, dip, and release to draw up water.
- Invite them to drip colored water into an empty clear dish or into another color to see what happens.
Learning Goals:
- Strengthen fine motor skills and hand muscles through squeezing droppers
- Explore color mixing and simple cause-and-effect relationships
- Support focus, patience, and careful hand–eye coordination

12. Pasting Flowers
Pasting flowers on the light table turns art into a quiet moment of wonder. When children place petals, leaves, and tissue pieces onto sticky surfaces, the light shines through and reveals every tiny detail. It’s a beautiful blend of nature, creativity, and fine motor practice that feels calming and meaningful.
Suggested Materials:
- Contact paper or clear sticky film
- Pressed or flat flower petals and leaves
- Tissue paper pieces in soft or bright colors
Simple Steps:
- Place a sheet of contact paper on the light table, sticky side up
- Set out small bowls of flower petals, leaves, and tissue pieces.
- Invite children to gently place the pieces onto the sticky surface to create their own glowing floral collage.
Learning Goals:
- Strengthen fine motor skills through careful picking and placing
- Develop aesthetic awareness and creativity in composition
- Observe details in natural materials

13. Track Toy Activities
Transform the light table into a glowing race track and you instantly invite problem-solving and cooperative play. Children love sending tiny cars on “missions,” watching shadows and reflections change as they move, and figuring out how to make their tracks smoother or longer.
Suggested materials
- Light table
- Small toy cars or trains
- Transparent or semi-transparent track pieces
- Or: strips of clear plastic, washi tape, or thin masking tape to create track lines
- Optional: bridges or tunnels made from clear blocks or cups
Simple steps
- Use transparent track pieces or tape to create simple paths and loops on the light table surface.
- Place cars or trains at one end of the track.
- Invite children to push the vehicles along the glowing paths, noticing how the light shines through or around the track.
- Encourage them to redesign or extend the tracks: “Can you make a turn?” “Can you connect two tracks together?”
- Add simple challenges like “Can you make a bridge?” or “Can your car visit every part of the track?”
Learning goals
- Understanding directionality and spatial concepts
- Cooperative thinking and sharing as children build shared tracks
- Fine motor coordination and control while guiding vehicles

14. Light Table Literacy Activities
A light table can become a cozy, glowing literacy corner where children gently fall in love with letters, sounds, and stories. When literacy feels like play children stay curious and engaged longer.
Suggested materials
- Transparent letter tiles or magnetic letters
- Laminated word cards or children’s names printed on clear sheets
- Simple picture-word cards on transparency film
Simple steps
- Choose one clear focus—names, letters of the week, simple CVC words, or environmental print.
- Place letter tiles and word or name cards on the light table.
- Invite children to match letters to their name or to the target word, placing each letter on top of its printed partner.
- For advanced learners, encourage them to build simple words and then find a matching picture or tiny object.
Learning goals
- Letter recognition and naming
- Understanding that letters combine to form meaningful words
- Developing early decoding skills by linking letters, sounds, and pictures
- Building confidence and joy around literacy in a playful, low-pressure way
How to Choose a Light Table?
When you’re choosing a light table for preschoolers, you don’t need to overthink it. Focus on a few practical points and you’ll be fine:
- Think About Size and Height:
Choose a size that fits your space and lets 2–4 children work comfortably at their level. - Brightness and Light Quality:
Pick a light table with soft, even light that’s bright enough to see materials clearly but not dazzling. - Safety and Stability:
Make sure it’s sturdy, doesn’t wobble, and has smooth, rounded edges suitable for young children. - Power and Placement:
Check cord length and outlet position so the table can stand where children won’t trip over cables. - Easy to Clean:
Choose a flat, sealed surface that can be quickly wiped after sensory and art activities. - Budget and Usage:
For occasional use, a simple light panel is enough; for daily classroom use, consider a larger, heavy-duty table. - Portability:
If you need to move or store it often, a lightweight, slim panel is more practical than a bulky table.
Our preschool light table is designed with all these points in mind, so you don’t have to worry about the details. It’s child-height, sturdy, easy to clean, and uses soft, even LED light that’s gentle on young eyes.


FAQs
- How long should preschoolers spend at the light table each day?
Short sessions of about 10–20 minutes are usually enough to keep interest and avoid overstimulation. Some children may choose to stay longer when deeply engaged, which is fine if they are comfortable and regulated. - Do I need a full-size light table, or is a flat light panel enough?
Flat light panels are usually sufficient for small groups of two to four children and are easier to store, move, and afford. Large table-style units are wonderful if you have the budget and space, but they are not essential for high-quality learning. - What age is a light table best for?
Most light table activities work well for ages 3–6. Younger toddlers can explore simple sensory setups under close supervision, while older preschoolers can enjoy more complex math, literacy, and STEM activities. - Does using a light table count as “screen time”?
Generally no. Children are handling real objects, talking, and moving their bodies. The light table is simply a light source, not a digital screen with changing images or media. - What materials work best on a light table?
Transparent or translucent items are ideal: magnetic tiles, glass gems, transparent counters, plastic letters, clear cups, pattern blocks, nature items laminated in clear film, and colored water in cups. - How many children should use the light table at once?
For preschool, 2–4 children at a time usually works well. This keeps the space calm, reduces conflicts over materials, and allows each child enough room to work. - Can light tables support children with special needs?
Yes. Many children with sensory, visual, or attention needs respond very well to light tables. The glowing surface can help them focus, the materials are highly visual, and the space can be quieter and more contained than other centers. Just adjust brightness, activity length, and materials to match each child.
Conclusion
A light table doesn’t have to be complicated to be powerful. When you choose a safe, easy-to-clean model that fits your space and pair it with simple, thoughtful activities, it quickly becomes more than a glowing surface. It turns into a small learning hub where children explore colors, shapes, letters, and stories in a calm, focused way.
Whether you’re a teacher planning centers or a parent setting up a cozy corner at home, starting with a few well-chosen invitations is enough to spark curiosity, creativity, and a lasting love of hands-on learning.


