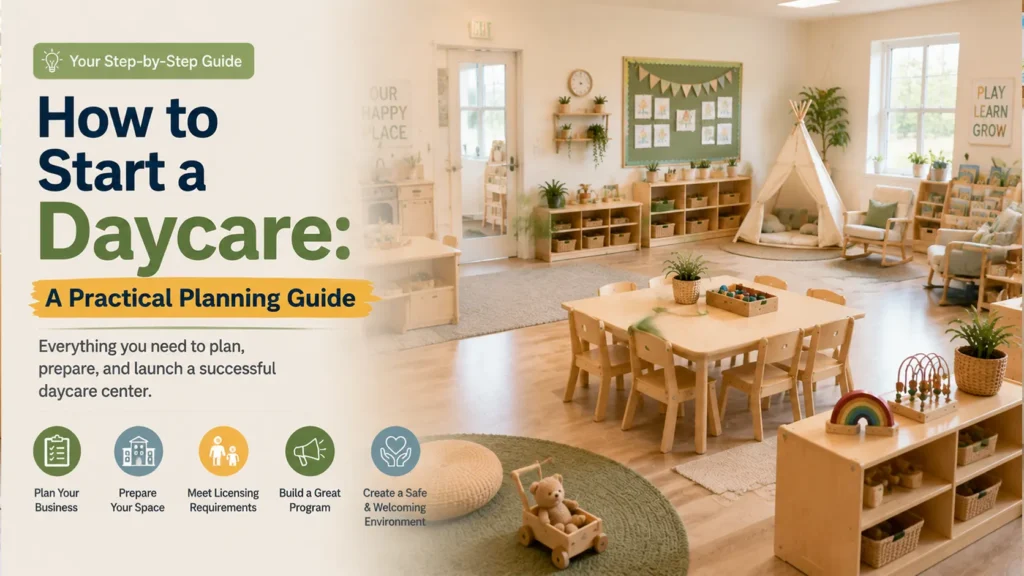
How to Start a Daycare: A Practical Planning Guide
Steven Wang
Post Views: 357
Share this article:
Table of Content
Last updated on: 2026-08-20
This practical guide covers the key steps to starting a daycare, with a stronger focus on real-world operations. From licensing and budgeting to space planning, staffing, and furniture selection, it helps you make practical decisions that reduce startup risks, control costs, and support smoother long-term operation.
Learning how to start a daycare requires balancing educational passion with strict commercial planning. You must align licensing, staffing, and furniture procurement into a professional project plan. Whether opening your first center or expanding a chain, this guide ensures your facility meets safety standards while optimizing for long-term .
How to Start a Daycare: Defining Your Business Model First
It sounds simple, but the age group you choose will dramatically affect your space, staffing, and equipment requirements. Take the time to decide whether you’re targeting infants, toddlers, preschoolers, or a mixed-age group. Pro tip: If you plan to care for infants (0–12 months), make sure you budget for a separate sleep area, dedicated cribs, changing stations, and a lower teacher-to-child ratio. Infant care regulations are typically stricter than those for older age groups — this is one of the most underestimated cost areas in the planning phase.
Determine your enrollment capacity and operating hours — do the math before you build.
Your enrollment numbers will directly determine how much space you need, how many classrooms to set up, and how much furniture to purchase. At the same time, nail down your operating model early — full-day or half-day? Do you offer extended care? How will naptime be arranged? All of these affect your space planning and staff scheduling.
Pay special attention to peak-hour attendance — the maximum number of children present at any given time. This number, not your total enrollment, should drive your classroom, crib, and staffing decisions. Many centers enroll 100 children but only have 70 on-site during peak hours. Configuring for that 70 can save you significant upfront costs.
First, figure out what kind of daycare you’re building — not what you’re buying.
When setting up a daycare center, don’t rush into buying furniture and setting up classrooms. First, calm down and determine your business model.
Your chosen business model will affect everything that follows—site selection, layout planning, equipment procurement, and even service pricing. Therefore, don’t rush into implementation. Take your time and think strategically about a few key issues.
Choice One: Independent or Franchise?
Running an independent school means you have complete self-determination—you can decide your educational philosophy, curriculum, brand positioning, and all profits belong to you. However, the cost is that you need to explore everything on your own: including but not limited to curriculum design, staff training, and marketing. Creating something from scratch is romantic, but it’s also destined to be a long and thorny road.
Franchising is the opposite. You join a mature system—brand awareness, curriculum, operating manuals, supply chain, and sometimes even site selection support. You don’t need to handle everything alone, but you pay a price for this convenience, such as franchise fees and licensing fees, and you don’t have final say on many core decisions. You’re operating someone else’s brand, but you can get started faster and with lower risk.
The key isn’t which approach is better—it’s who you are. Do you enjoy building things from scratch and can withstand the process of trial and error? Or would you prefer to let others pave the way and focus on running it well? There’s no standard answer to this question, but your choice will determine everything that follows.
Choice Two: What’s Your Educational Philosophy?
Whether you go independent or franchise, you still need to answer this question: What does your daycare stand for educationally?
This might sound abstract, but it has a direct impact on how your physical space is designed. Different philosophies have very different requirements for furniture, layout, and materials:
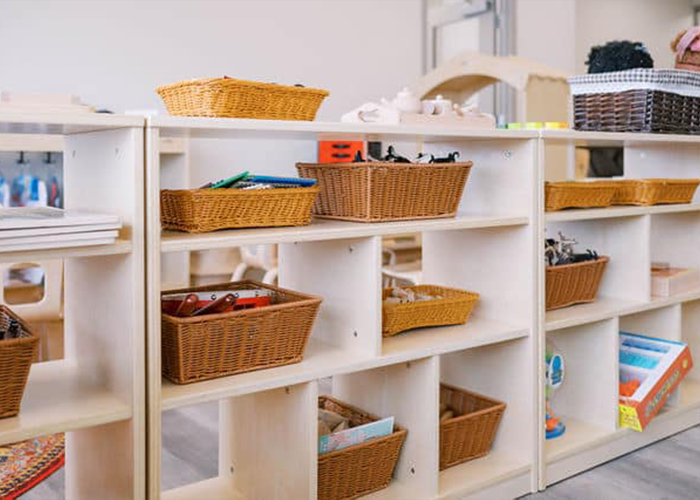
Montessori-stylecenters have specific requirements for shelf dimensions, materials, and placement. Everything is about “child-sized, open access, natural materials.”
Reggio Emilia-inspired centers emphasize “the environment as the third teacher.” Spaces need to be flexible, reconfigurable, and furniture needs to support different project-based learning scenarios.
Play-based programs prioritize open-ended spaces, free play areas, and natural materials. Furniture choices lean toward durability and multi-functionality.
The point is: don’t buy furniture first and then figure out your philosophy. Figure out your philosophy first, then let it guide your furniture choices. Your operating model determines the level of equipment you buy; your educational philosophy determines the type of equipment you buy. Get these two questions right, and your purchasing list will almost write itself.
Choice Three: Who Are You Serving?
This sounds like a marketing question, but it’s really an operating model question.
Your pricing strategy, service hours, curriculum design, and even your location all depend on what kind of families you’re planning to serve. Are you going for an affordable, community-based, full-day daycare that serves working parents in the neighborhood? Or are you positioning yourself as a premium, small-class, education-focused brand? This determines your budget distribution — a premium positioning likely means more investment in furniture and finishes, while an affordable model requires tighter cost control across the board.
The core of this question is: don’t try to build a premium center on a mid-range budget, and don’t pair a premium brand with budget equipment. Consistency matters: Don’t pair a premium brand with residential-grade furniture that breaks in six months.Your operating model determines your cost structure, and your cost structure in turn determines your purchasing strategy. Consistency on this front matters more than anything else.
At the end of the day, figuring out your operating model is really about answering one question: what do you want this daycare to look like three years from now? Get that clear, and everything else — from budgeting to purchasing, from renovation to hiring — becomes a lot simpler.
Check Your Local Licensing Requirements
First, please contact your local regulatory authority to inquire about the specific requirements applicable to your particular type of childcare center and the age groups you intend to serve.
At a minimum, you need to verify the following:
Minimum indoor floor area required per child
Staff-to-child ratios for each age group
Requirements for restrooms and hand-washing facilities
Regulations regarding nap times and infant sleep arrangements
Requirements for outdoor activity areas
Fire exit and emergency evacuation protocols
Requirements for food preparation and kitchen facilities
Staff qualifications and background check requirements
Safety standards for furniture and equipment
Zoning regulations, approved capacity limits, and building usage restrictions
Please clarify the following three points as early as possible: whether the premises are authorized for legal childcare operations, the actual approved capacity for children, and what physical modifications are required prior to obtaining approval. The answers to these questions will directly influence your decisions regarding leasing, renovation budgets, staffing plans, and furniture procurement.
Strong Correlation Between Rules and Regulations
Student-teacher ratio, fire safety, and hygiene standards may seem like individual, minor issues, but they actually form a system:
Your staff-to-child ratio determines how many teachers you need — your biggest ongoing cost.
Your fire and evacuation rules affect where you can place cribs and how wide your hallways need to be — which can rule out certain buildings entirely.
Your hygiene standards dictate how many handwashing stations you need and where diaper changing stations can go.
Your staff qualification requirements affect your hiring pool and salary budget.
A change in one area ripples through all the others. Understanding these connections is what separates a smooth licensing process from one full of surprises.
The Real Value Of the Compliance File Isn’t The Paperwork — It’s the Process
Don’t pick a facility and then try to fit the regulations into it. Start with the regulations, let them guide your design decisions, and then find a facility that works. That tiny detail about how far a crib needs to be from a window? If you catch it during planning, it’s a minor adjustment. If you catch it during inspection, it’s a failed inspection and a delayed opening.
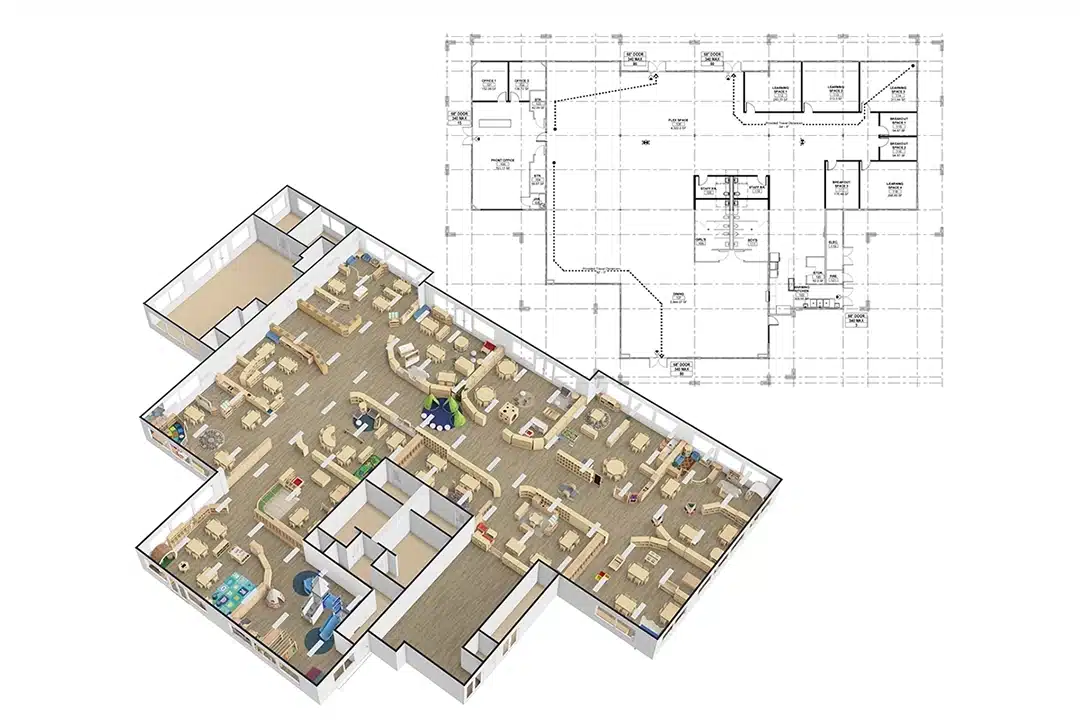
Choose a Suitable Location and Plan Your Space
Space Planning Should Prioritize Practicality
Your location and space plan will directly affect how efficiently your daycare operates for years to come. A facility with low rent but difficult drop-off access, high renovation costs, or poor circulation may not actually save you money. Likewise, a classroom that looks attractive but is difficult to supervise can create daily operational problems.
You should first decide whether the location is truly suitable for a daycare, and then determine how the space should be planned around the real needs of children and staff.
Choose a Location That Works for Daily Daycare Operations
When evaluating a property, do not compare only rent and square footage. You need to imagine what the center will look like during a normal working day: parents arriving and leaving, staff moving between rooms, children going outdoors, deliveries arriving, waste being removed, and emergency evacuation routes being used.
Before you sign a lease, check at least the following:
Local demand: Look at nearby residential areas, offices, schools, and new developments to make sure there is enough demand for childcare in the area.
Drop-off and pick-up access: Parking, short-term stopping areas, entrance location, and traffic during peak hours all affect the parent experience.
Building suitability: Check natural light, ventilation, emergency exits, bathrooms, plumbing, kitchen facilities, and accessibility.
Outdoor access: If children must cross a parking lot, public hallway, or long walkway every time they go outside, you need to consider the additional supervision and logistical challenges.
Storage and back-of-house space: Learning materials, bedding, cleaning supplies, replacement furniture, and daily consumables all need dedicated storage.
Room for future growth: Consider whether you could add another classroom, change age groups, or expand the outdoor area as enrollment increases.
You should also calculate the true cost of using the property, not just the monthly rent. A cheaper building that requires major work to bathrooms, fire systems, outdoor areas, or interior partitions may ultimately cost more than a facility that is already closer to childcare requirements.
Before signing the lease, have an architect, childcare consultant, or local licensing authority review the property. Problems discovered during planning are usually much cheaper to fix than problems discovered after construction begins.
Plan the Space Around Daily Operations
Once you have selected the facility, do not immediately start filling the floor plan with furniture.
First think about how children and staff will actually use the space every day.
A daycare is a high-use environment. Teachers constantly move between activity areas, bathrooms, changing stations, storage, sleep areas, and outdoor spaces. Children transition between play, meals, group activities, naps, toileting, and outdoor time throughout the day.
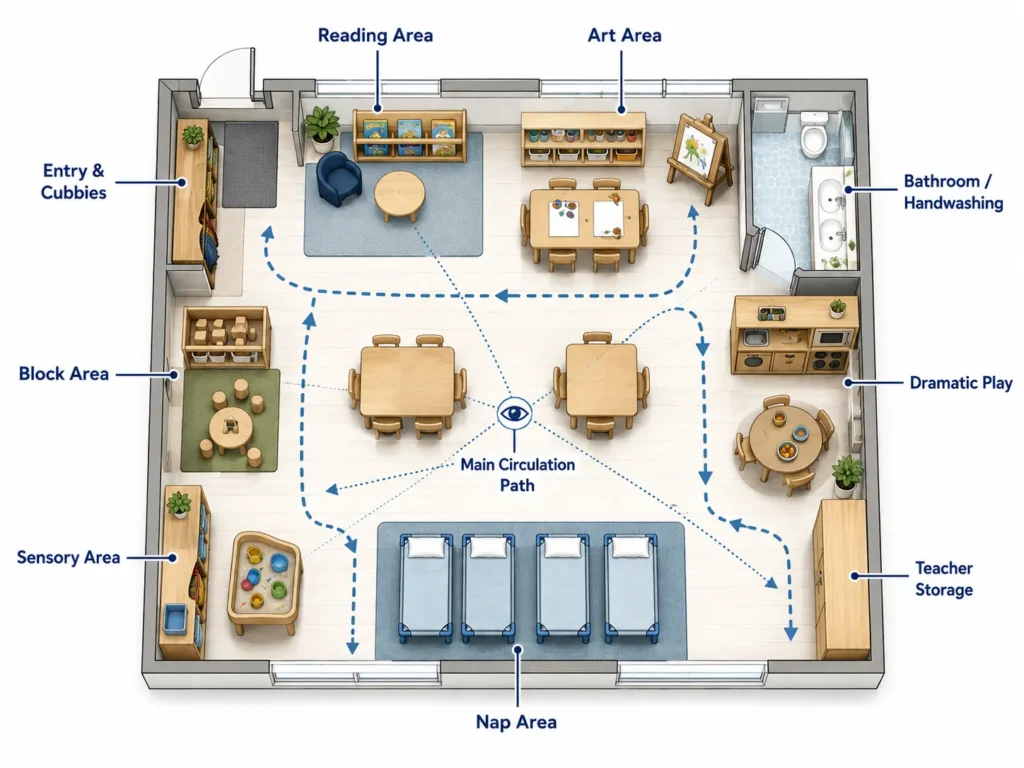
Start by creating clear functional zones, such as:
Arrival and cubby area
Play and learning areas
Reading and quiet area
Art and sensory area
Dining area
Nap area
Toileting and changing area
Teaching material storage
Cleaning and service areas
The relationship between these zones matters.
For example, changing stations should be close to infant activity areas. Nap areas should be kept away from busy circulation routes. Frequently used classroom materials should be stored where staff can reach them easily. Outdoor entrances should have convenient storage for children’s coats, shoes, and personal belongings.
You should also pay close attention to staff sightlines.
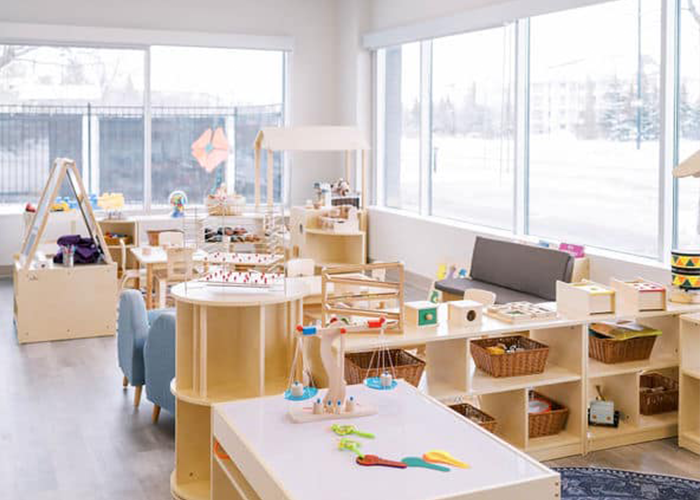
Avoid tall cabinets, complicated partitions, or oversized furniture that create unnecessary blind spots. Low shelving and storage units can divide learning areas while still allowing teachers to supervise children across the room.
Keep the main circulation routes clear as well. Children should not have to repeatedly move around tables and large furniture when going to bathrooms, nap areas, or outdoor spaces. This becomes especially important during arrival, departure, group transitions, and emergency evacuation.
Finally, avoid making every part of the classroom too permanent.
Enrollment numbers, age groups, and curriculum needs may change over time. Modular storage, movable furniture, and reconfigurable tables and chairs usually provide more long-term flexibility than fixed layouts.
After completing your first layout, do not just review the drawing. Simulate a real day. Where do children enter? Where do they put their bags? Where do teachers get supplies? Where are nap beds stored? How do children reach the bathroom? How does the class prepare to go outdoors? If a routine requires repeated detours, waiting, or crossing the entire classroom, the layout probably still needs adjustment.
Ultimately, the best daycare space is not the one with the most furniture or the most impressive decoration. It is the one that makes children safer, supervision easier, and daily operations more efficient.
Build a Realistic Startup Budget
Don’t ask “how much does it cost?” — ask “how much will it cost you over time.”
One of the most common mistakes operators make when budgeting for a new daycare is focusing solely on upfront costs. While purchasing cheaper tables, cribs, or storage units might save money initially, these items can end up costing more in the long run if they require frequent repairs, are difficult to clean, or break down prematurely.
Your budget should distinguish between two types of expenses:
One-time costs: These include security deposits, renovations, furniture, licensing fees, initial equipment purchases, and marketing expenses. Recurring costs: These include rent, wages, utilities, supplies, cleaning, maintenance, and equipment replacement costs.
The key is recognizing that decisions made during initial purchasing directly impact future recurring costs.
For example, a classroom table priced at $150 might seem like a better deal than a $300 commercial-grade table. However, if the cheaper table requires an extra five minutes to clean each day, staff will spend approximately 22 additional hours on cleaning over the course of a year. At a wage of $15 per hour, this translates to an extra $330 in annual labor costs.
For this reason, you should consider the “total cost of ownership” rather than just the purchase price when making decisions.
Additionally, you must account for wear and tear. Daycare furniture sees much heavier use than residential furniture; consequently, even high-quality equipment will eventually require repair or replacement. It is advisable to set aside an annual maintenance reserve fund—sized according to your equipment needs—so that you have the necessary funds available without panic when furniture or equipment breaks and needs replacing.
A startup budget should not only support a successful opening but also ensure long-term, stable, and sustainable operations. Therefore, when making purchases, be sure to factor in long-term costs, durability, quality and safety, and maintenance requirements.
Example Daycare Startup Budget
The following example is based on a small-to-medium childcare center serving approximately 40–60 children in a leased commercial facility. Actual costs will vary significantly by location, licensing requirements, building condition, and program size.
Budget Category
Typical Share of Startup Budget
Example Budget Based on $250,000
What It Covers
Facility Deposit & Pre-Opening Rent
8%
$20,000
Security deposit, advance rent, utility deposits, and occupancy costs before opening
Renovation & Compliance Work
28%
$70,000
Classroom construction, bathrooms, sinks, flooring, fire safety, partitions, accessibility, and required building modifications
Website, signage, local advertising, open-house events, printed materials, and enrollment campaigns
Initial Payroll & Staff Training
12%
$30,000
Recruitment, background checks, orientation, training, and payroll before enrollment reaches a stable level
Working Capital & Contingency Reserve
17%
$42,500
Unexpected costs and operating cash for the first months while enrollment is still growing
Total
100%
$250,000
Illustrative startup budget
Do not treat these percentages as fixed rules. A facility that already meets childcare requirements may require far less renovation, allowing you to invest more in furniture, staff, or working capital. On the other hand, an older building may consume a much larger share of your budget before you purchase a single classroom table.
The important point is to budget for the entire opening process, not just the items you can see on opening day.
You should also separate your startup budget from your replacement and maintenance budget. Once the center is operating, furniture, toys, cots, playground equipment, and classroom materials will gradually wear out. Setting aside a small annual replacement reserve helps prevent these costs from becoming unexpected emergencies.
Configure Safe and Functional Daycare Classrooms
Here’s a truth that most new daycare owners don’t realize until they’ve already bought the furniture: you’re not just furnishing a room — you’re engineering a environment that shapes how children behave, how staff move, and how safely the whole place runs.
This is the most hands-on section of your entire setup, and it’s the one that connects most directly to your furniture business. But let’s be clear: the goal here isn’t to fill a room with furniture. It’s to create a space where every piece serves a purpose — For the sake of the children and the teachers, and to ensure that the daily care routine can proceed in a safe environment.
Choose Furniture Based On Age and Developmental Stages
You don’t buy furniture for a room. You buy furniture for a specific age group — and those two things are very different.
An infant room and a toddler room look like they’re in different businesses. And they should be. The mistake most people make is buying a general “daycare” set and calling it done. But a two-year-old who’s learning to walk and a five-year-old who’s learning to write have completely different needs from their furniture.
Infant rooms (0–18 months): This is about care and safety, not about independence. Your furniture list centers on cribs, diaper changing stations, and feeding chairs. The key here is that every piece is designed for the adult who’s doing the work — changing tables at the right height so staff don’t wreck their backs, cribs that are easy to lower and raise, storage that keeps diapers and wipes within arm’s reach of the changing station. Infants can’t move themselves, so your furniture is really about supporting the caregiver’s workflow around the baby.
In an infant room, the furniture is for the adults. The baby just needs to be safe and comfortable. Design your furniture choices around the caregiver’s movement — not the infant’s.
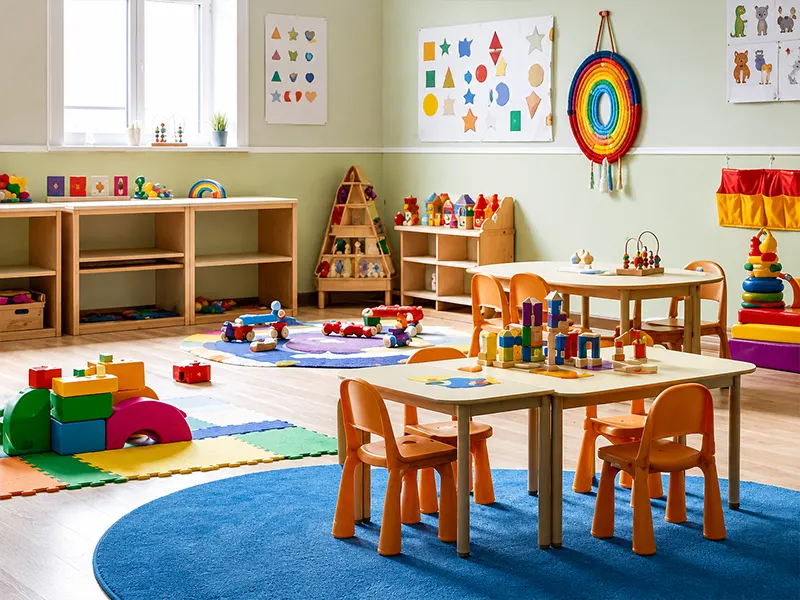
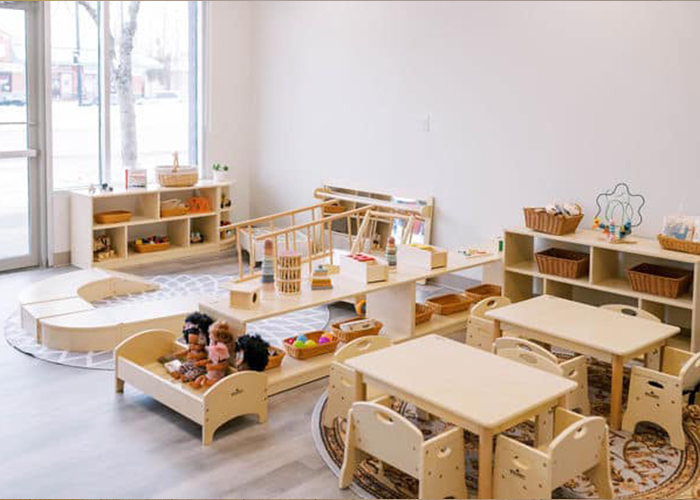
Toddler rooms (18 months–3 years): This is where everything changes. Toddlers are mobile, curious, and beginning to assert independence. Now your furniture needs to be accessible to them — low shelves where they can reach their own toys, small tables and chairs at the right height for their bodies, activity tables that invite exploration.
This is also where you need to think about transitions. A toddler room isn’t one activity — it’s a constant flow of eating, sleeping, playing, and diaper changes. Your furniture needs to support all of those transitions without creating bottlenecks.
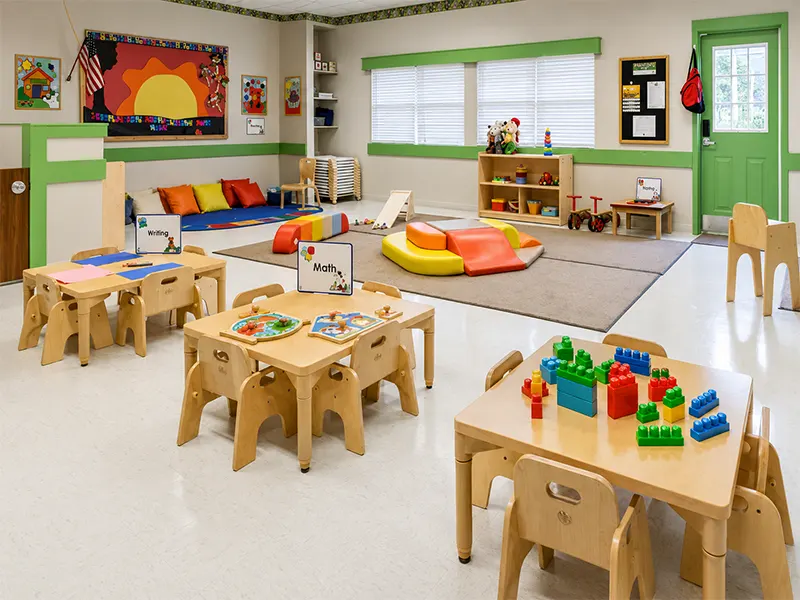
Preschool rooms (3–5 years): Now you’re looking at defined learning zones — a reading corner, an art area, a block-building zone, a group circle area. Furniture here needs to be flexible and reconfigurable. Tables that can be pushed together for group activities or separated for individual work. Shelving that can define zones without blocking sight lines.
The key point: Every age group needs a different relationship with their furniture. Infants need furniture that supports care. Toddlers need furniture that supports emerging independence. Preschoolers need furniture that supports learning and social interaction. If you buy one set of furniture and use it for all three, you’re compromising on all three.
Furnish The Classroom By Activity Zone
Plan each zone around what children and staff actually do there, then buy only the furniture that supports that activity.
Reading Area: Use a front-facing bookshelf and simple soft seating. Keep the area quiet and uncluttered.
Art Area: Use child-sized tables, chairs, an easel, and nearby storage for frequently used materials.
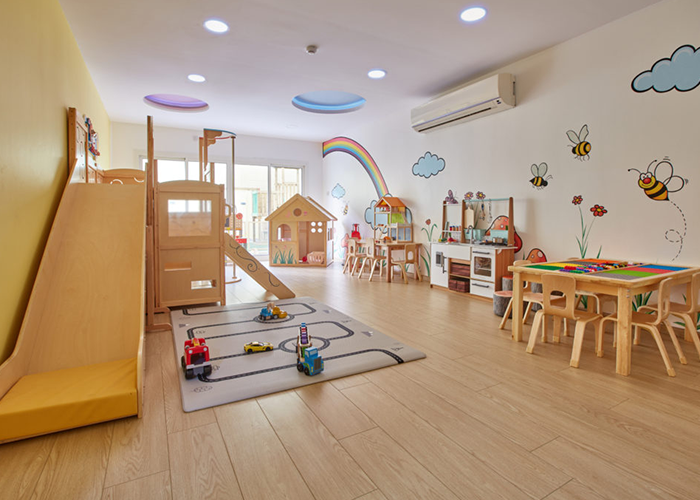
Block Area: Prioritize open floor space. Use low shelving for blocks and avoid overfilling the area with furniture.
Dramatic Play Area: Choose flexible role-play furniture and storage that can be rearranged as themes change.
Nap Area: Use age-appropriate cots or cribs with dedicated bedding storage and clear staff access.
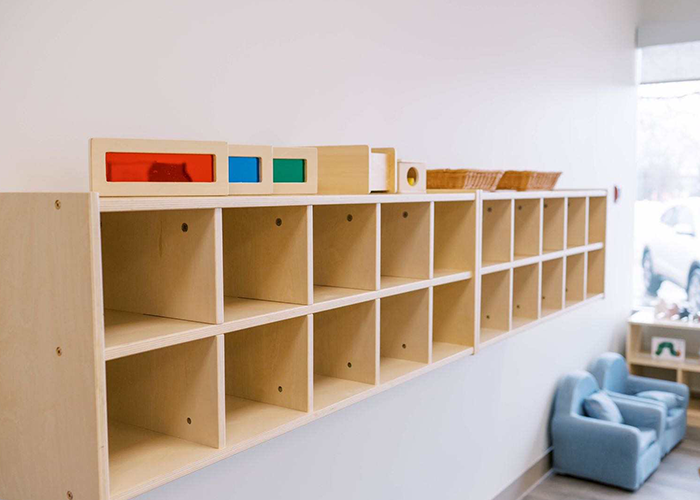
Entry Area: Use cubbies, hooks, and benches without blocking the main circulation route.
Do not choose furniture first and then look for somewhere to put it. Define the activity, choose the essential furniture, and then confirm the quantity. If a piece of furniture does not support a clear daily function, you probably do not need it.
A daycare can only operate smoothly with the right staffing plan. You should not wait until a few weeks before opening to start hiring. Staffing should be planned together with enrollment, classroom capacity, and your operating budget.
Staff According to Enrollment
Start by checking the required staff-to-child ratios for each age group, then estimate how many lead teachers, assistants, and backup staff you will need.
Do not plan only around the minimum requirement. Staff breaks, training, sick leave, and unexpected absences can quickly affect daily operations, so some backup capacity is important.
Focus On Practical Skills
Qualifications and certifications are only the starting point. You should also evaluate whether candidates can:
Communicate well with children and parents
Follow safety and hygiene procedures
Work effectively with other staff
Handle daily routines calmly
Respond appropriately to unexpected situations
During interviews, practical scenario-based questions can often tell you more than education history alone.
Hire In Stages
A phased hiring approach can help control payroll costs:
Hire the director and core teachers first
Add lead teachers and assistants based on confirmed enrollment
Add administrative, kitchen, cleaning, and substitute staff as enrollment grows
This allows you to build a reliable team without carrying full staffing costs too early.
Establish Health, Safety, and Operational SOPs
Opening your doors is just the first step. The real challenge is ensuring your staff knows exactly what to do when you aren’t in the room. A detailed manual collecting dust in a drawer won’t protect your center; you need a living, breathing Standard Operating Procedure that your team actually follows.
Define Clear Roles and Daily Routines
Don’t just hire teachers; assign specific safety responsibilities. Your SOP should clearly state who is responsible for the morning perimeter check, who handles the mid-day sanitization of high-touch furniture, and who performs the final security sweep before the last light is turned off. When you define these roles early, you eliminate the “I thought someone else was doing it” excuse that often leads to licensing violations.
Cleaning and Disinfection
In a high-traffic daycare, cleaning isn’t a chore—it’s a non-negotiable part of your brand’s reputation. You should establish a two-tier cleaning SOP:
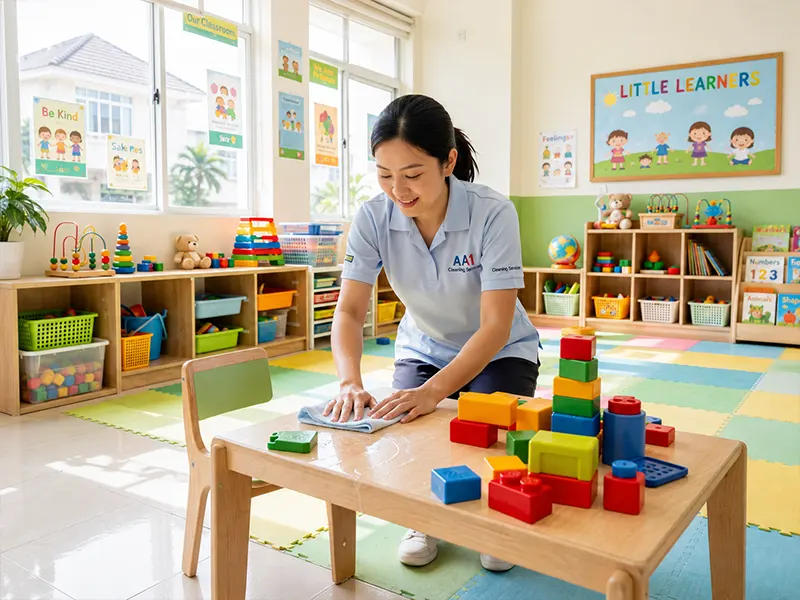
Daily Wipe-downs: Your staff must use facility-approved, non-toxic disinfectants on every table and storage unit between sessions. This is where your choice of commercial-grade, non-porous furniture pays off—it allows your team to sanitize a classroom in minutes rather than hours.
Weekly Deep Cleans: Schedule a time once a week to pull everything away from the walls, check the drains in your sand and water tables, and inspect for hidden dust or mold.
Commercial Safety Standards
This is where the difference between “looks like daycare furniture” and “actually belongs in a daycare” becomes clear.
Daycare centers are dynamic environments—where children crawl, run, and jump, and furniture sees constant daily use—demanding exceptional product durability and strength. Under these conditions, the features listed below are essential requirements for ensuring children’s safety. If your furniture does not meet these standards, it is unsuitable for use in your center.
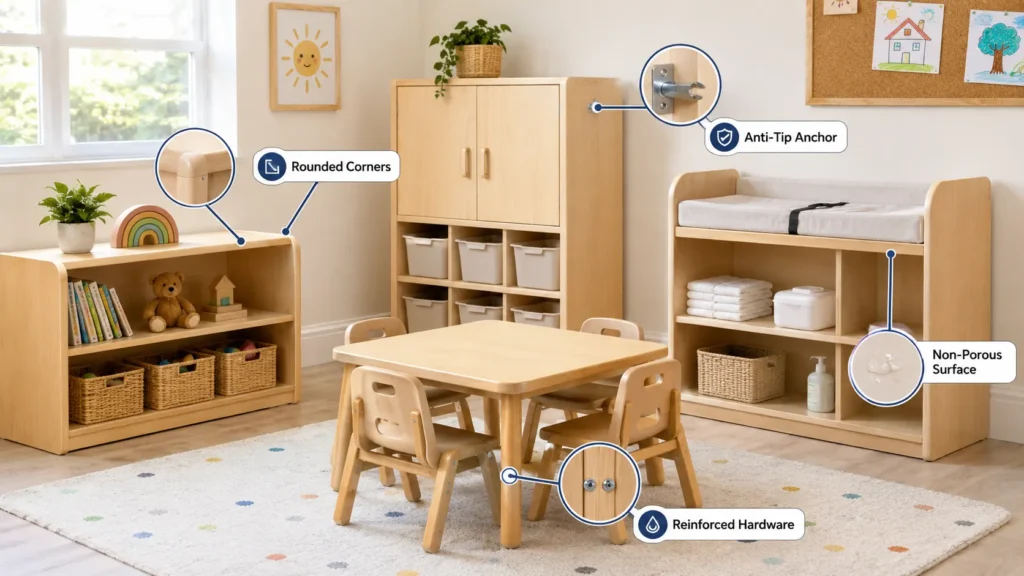
Rounded corners — everywhere. In many jurisdictions, this is not a recommendation — it’s code. A sharp corner at toddler eye level is an accident waiting to happen, and that accident becomes your liability. Beyond safety, rounded corners also happen to be more durable — they chip and crack less easily than sharp edges. But the primary reason is non-negotiable: every piece of furniture in a daycare should have smooth, rounded edges wherever a child can possibly touch. Period.
Non-porous surfaces. Health regulations don’t care about your aesthetic preferences. Surfaces that absorb spills — unfinished wood, cheap laminate, porous materials — become breeding grounds for bacteria, mold, and odors. In a daycare, everything gets spilled on: paint, glue, juice, milk, and worse. If your furniture can’t be wiped clean and sanitized in seconds, it won’t pass inspection — and more importantly, it’s not safe for children. Non-porous surfaces are a health compliance requirement, not a convenience feature.
Why this matters: Every time your staff has to scrub a stain instead of just wiping it, that’s time they’re not spending with children. But more fundamentally, a surface that can’t be properly sanitized is a surface that shouldn’t be in a childcare environment. Licensing inspectors will notice. More importantly, parents trust you with their kids — that trust demands cleanable surfaces.
Sturdy hardware — structural safety first. Furniture collapse is a real safety hazard in daycare settings. Residential furniture is often assembled with staples, glue, or thin screws — fine for a living room, dangerous in a room full of climbing toddlers. The joints, brackets, and hardware determine whether a bookshelf stays upright when a child leans on it, or whether a table leg buckles when kids crowd around. Look for reinforced joinery, metal brackets, and hardware designed for repeated heavy use. Drawers should glide smoothly. Doors should stay aligned. Legs shouldn’t wobble. This is not about durability in the abstract — it’s about preventing accidents.
Anti-tip anchoring — not optional. This is one of the most overlooked safety requirements, and it’s a non-negotiable in any licensed childcare center. Any furniture taller than a child — shelving units, cabinets, changing tables, storage towers — must be anchored to the wall. Every single piece. Tip-over accidents are among the most preventable yet devastating incidents in childcare settings. If your furniture doesn’t come with anti-tip hardware pre-installed or clearly designed for it, keep looking. This isn’t something you add later — it’s something you plan for from the start.
These are not features to compare and weigh against each other. They are the entry ticket. Before you compare prices, before you choose colors, before you think about aesthetics — check that every piece of furniture in your center meets these standards. Because in the end, the best furniture isn’t the one that looks nicest in the catalog. It’s the one that keeps children safe, passes inspection, and lets your staff focus on what they’re there to do: care for kids.
Complete Training Before Opening
Before children arrive, make sure staff understand:
Drop-off and pick-up procedures
Classroom layout
Cleaning and sanitation
Nap and toileting routines
Emergency evacuation
Outdoor supervision
Parent communication
Incident reporting
A full practice day before opening can help identify problems in your routines and staffing plan.
Practical advice: Do not only ask, “What is the minimum number of staff required for licensing?” Ask whether your team can still operate smoothly during absences, peak periods, and enrollment growth.
The bottom line: Your staffing plan should be developed together with your enrollment target, budget, and opening schedule. The right team supports compliance, better childcare, and more stable long-term operations.
Your Pre-Opening Checklist: The Final Walk-through
Before you welcome your first child, you need to perform one final, aggressive walk-through. This isn’t about looking for dust—it’s about simulating the daily chaos and identifying safety failures before a licensing inspector does.
The Facility Audit
Don’t just look at the floor plan; walk the evacuation routes. Is your state license framed and visible right by the entrance? Are all electrical outlets fitted with commercial-grade safety covers? Test your access-control system ten times in a row. If a parent can’t get in, or more importantly, if a toddler can get out, your facility isn’t ready.
The “Crawl Test” For Furniture
Get on your hands and knees and experience each classroom from a child’s eye level. Feel the underside of your tables—are there any exposed staples or rough edges? Check that every single bookshelf and storage tower is securely anchored to the wall (anti-tip hardware is a non-negotiable). Verify that your crib mattresses fit perfectly with no more than a two-finger gap. If your furniture feels wobbly or the layout blocks your staff’s sightlines, fix it now.
The Staff Drill
Your team might have their certificates, but do they have the muscle memory? Run a full evacuation drill. Ask a teacher at random to find the cleaning SOP. If they have to search for more than 30 seconds, your system has failed.
Key Mistakes That May Delay Your Business Opening
Even with a great plan, these five pitfalls regularly sink new daycare centers. Avoid these to protect your timeline and your budget:
Underestimating “TCO” Maintenance: If you buy furniture that is porous or hard to clean, you are adding 30+ minutes of labor to your staff’s day. Over a year, that cheap table will cost you more in wages than a premium Xiha Montessori commercial table would have cost upfront.Low-priced furniture not only entails high long-term costs, but—even more critically—is highly prone to cracking or missing hardware during assembly. For clients relying on imports from China, replacing a single key component can take two weeks; that two-week gap is often precisely what causes you to miss the crucial “grand opening” week.
Signing a Lease Without a Fire Pre-Audit: Never sign a long-term lease until the fire marshal has walked the space. If they require an extra exit or a specific sprinkler system you didn’t budget for, it could cost you tens of thousands before you even open.
Mixing Residential and Commercial Furniture: Trying to save money by buying home-grade cribs or shelving is a trap. Residential furniture will fail a licensing inspection and, more importantly, it will break under the stress of 6+ hours of daily use.
Ignoring the “Operational Flow”: Don’t overfill your rooms. A classroom that is too crowded makes supervision impossible and evacuation dangerous. Leave space for teachers to move quickly.
Conclution
Starting a daycare is more than an entrepreneurial journey; it is an exercise in meticulous risk management. As we’ve explored in this guide, every decision—from your initial business model to the non-porous finish of your tables—dictates your center’s long-term safety, staff efficiency, and profitability.
Success in this industry doesn’t come from finding the lowest price tag; it comes from finding a manufacturing partner who understands that furniture is a critical tool for care.
At Xiha Montessori, we bring 20 years of professional manufacturing expertise to the table. We don’t just supply cribs and cabinets; we help daycare owners and directors engineer spaces that are Safe by Design. Our products are built to withstand the rigors of high-traffic commercial use, ensuring that your facility remains compliant, your staff stays efficient, and your investment lasts for a decade, not just a season.
Are you ready to build a facility that stands out? Reach out to the Xiha Montessori project team today. Whether you need help with classroom layout optimization or a comprehensive procurement quote for your next campus, our experts are ready to walk you through the process.
FAQ
1. How much space do you need to start a daycare? Licensing requirements vary, but a common commercial standard is 35 to 50 square feet of usable indoor space per child. This does not include hallways, kitchens, or bathrooms. For outdoor areas, aim for 75 square feet per child. Always check your local regulations before signing a lease to ensure your capacity goals match the physical square footage.
2. What furniture does a new daycare need? At minimum, you need age-appropriate sleeping equipment (cribs or mats), child-sized tables and chairs, organized storage units, a diaper-changing station, and staff furniture. We recommend choosing modular storage that can grow with your center and non-porous surfaces that meet commercial health standards.
3. How many cribs does a daycare need? Don’t buy based on enrollment; buy based on your licensed capacity and simultaneous sleepers. If your room is licensed for 10 infants, you need 10 dedicated crib spaces. We also recommend having at least one spare crib in storage for rotation during deep cleaning or unexpected repairs.
4. What safety documents should daycare furniture suppliers provide? Never accept “it’s safe” as an answer. Demand third-party lab test reports (like CPSC, ASTM, or EN71), GREENGUARD Gold certifications for air quality, and manufacturer’s warranty documents. If a supplier cannot provide batch-level traceability or safety certificates, their furniture does not belong in a licensed center.
5. How do you plan a daycare classroom layout? The golden rule is sightline optimization. Place taller storage against walls and keep activity tables in the center. Ensure there is a clear, unobstructed path to every emergency exit. Your layout should allow a single teacher to supervise every child in the room without moving from their primary work zone.
6. What is the most expensive part of starting a daycare? While rent and renovation are high upfront costs, staffing and long-term maintenance are the true drivers of expense. Choosing cheap, residential-grade furniture is a common trap—it leads to frequent replacement costs and high labor hours for cleaning, which can quickly drain your profitability.
7. Do daycare centers need separate sleep areas? For infants (0-12 months), most jurisdictions require a separate, quiet sleep area distinct from the active play zone. For older toddlers, sleep mats can often be used in the primary classroom. Confirm your local licensing code, as this significantly impacts your HVAC and space planning.
Get the Ultimate Guide
Effortlessly Source Preschool Furniture Solutions
Share this article:
The Author >>
Roger Cai
Hey, I’m Roger, the founder of Xiha Montessori, a family-run business. We specialize in preschool furniture and educational solutions. Over the past 20 years, we have helped clients in 55 countries and 2000+ preschools, daycares, and early childcare centers create safe and inspiring learning environments. This article shares knowledge on making education more effective and enjoyable for children.
Over the past 20 years, we have helped 55 countries and 2000+ Clients, like Preschools, Daycare, and Early Childcare Centres, to create safe and inspiring learning environments. If you need a purchase or consultation, please contact us for a free product catalog and classroom layout design.